
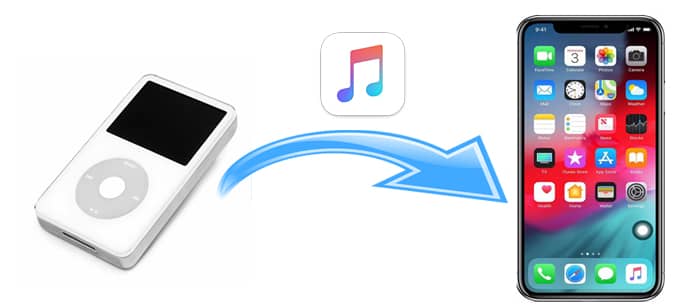
How to Transfer Music from iPod to iPhone, use iTunes or third-party software. Connect both devices to your computer.
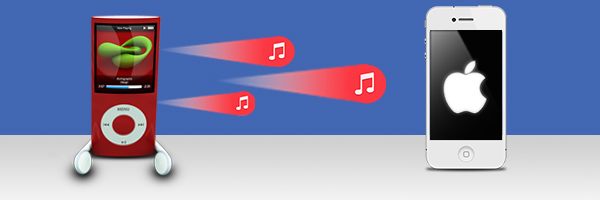
Transferring music between devices can seem daunting. ITunes remains a reliable method for managing and transferring your music library. Third-party software options also offer user-friendly solutions for this task. Ensuring a smooth transfer process is crucial to maintaining your music collection’s integrity.
Utilizing these tools helps preserve your playlists, albums, and individual tracks without hassle. Whether you prefer the traditional iTunes approach or the flexibility of third-party apps, you can easily move your favorite tunes. A few simple steps will have your music playing on your iPhone in no time.
How to Transfer Music from iPod to iPhone?
Using Itunes
Transferring music from your iPod to your iPhone can seem daunting. One of the easiest ways to do this is by using iTunes. This reliable method ensures your favorite tunes make the leap from one device to another. Let’s break it down step by step.
Connect Ipod To Computer
First, you need to connect your iPod to your computer. Use the USB cable that came with your iPod. Once connected, open iTunes on your computer. iTunes should recognize your iPod automatically.
Here are the steps to connect your iPod:
- Plug the USB cable into your iPod.
- Connect the other end of the cable to your computer.
- Open iTunes if it does not start automatically.
If you have trouble connecting, try using a different USB port or cable. Make sure your iTunes is up to date. This ensures compatibility and smooth transfer.
When your iPod is connected, you should see it listed in the devices section of iTunes. Click on your iPod to open its summary page. This page shows all the details of your iPod.
Sync Music To Itunes
Next, you need to sync your music from the iPod to iTunes. This step is crucial to ensuring that all your music is available for transfer to your iPhone.
Follow these steps to sync music:
- Click on your iPod in iTunes to open the summary page.
- Navigate to the “Music” tab in the sidebar.
- Check the box that says “Sync Music.”
- Select “Entire music library” or “Selected playlists, artists, albums, and genres” based on your preference.
- Click “Apply” to start the sync process.
The syncing process might take some time, depending on the size of your music library. Once the sync is complete, all your music should be available in iTunes.
It’s important to note that this method also helps if you’re wondering how to transfer data from an old iPod to a new iPod touch. The process is similar, making it versatile for different needs.
Connect Iphone And Sync Music
Finally, connect your iPhone to the computer to sync the music from iTunes. This will transfer the music files from iTunes to your iPhone seamlessly.
Here’s how to do it:
- Disconnect your iPod from the computer.
- Connect your iPhone using its USB cable.
- Open iTunes and click on your iPhone in the device list.
To sync music to your iPhone:
- Go to the “Music” tab under your iPhone summary.
- Check the “Sync Music” box.
- Select “Entire music library” or specific playlists, artists, albums, and genres.
- Click “Apply” to start syncing.
Your music will now transfer to your iPhone. This ensures that all your favorite songs from your iPod are now on your iPhone. If you’re interested in transferring music from iPod to iPhone without a computer, you might need third-party apps or cloud services. However, using iTunes remains one of the most straightforward methods.
Using Third-party Software
Transferring music from an iPod to an iPhone can be a bit tricky, especially if you’re not tech-savvy. Using third-party software makes this process simpler and more efficient. These tools offer an intuitive interface and a seamless way to move your favorite tunes. Let’s explore how to use third-party software to transfer your music effortlessly.
Download And Install Software
First, you need to download and install the appropriate software on your computer. Several options like iMazing, AnyTrans, and TouchCopy are popular choices. Follow these steps:
- Go to the official website of the software you prefer.
- Click on the download link for either Mac or Windows.
- Once the download completes, open the file to start the installation process.
- Follow the on-screen instructions to complete the installation.
Here’s a comparison table of some popular third-party software:
| Software | Features | Price |
|---|---|---|
| iMazing | Transfer, Backup, Manage | $44.99 |
| AnyTrans | Transfer, Backup, Restore | $39.99 |
| TouchCopy | Transfer, Backup, Print | $29.99 |
After installing the software, you’re ready to start transferring your music.
Transfer Music From Ipod To Computer
Now, it’s time to transfer music from your iPod to your computer. Follow these steps for a smooth transfer:
- Connect your iPod to your computer using a USB cable.
- Launch the third-party software you installed earlier.
- The software will recognize your iPod. Click on the device icon to access its contents.
- Navigate to the Music section.
- Select the songs or albums you want to transfer.
- Click on the “Export” or “Copy to PC” button.
- Choose a destination folder on your computer and confirm the action.
Wait for the transfer to complete. Depending on the size of your music library, this could take a few minutes. Once the transfer finishes, you will have all your music stored safely on your computer.
Transfer Music From Computer To Iphone
Finally, you need to transfer music from your computer to your iPhone. Follow these steps to complete the process:
- Disconnect your iPod and connect your iPhone to the computer using a USB cable.
- Open the same third-party software.
- Select your iPhone from the device list.
- Navigate to the Music section.
- Click on the “Import” or “Add Music” button.
- Browse to the folder where you saved your iPod music.
- Select the songs or albums you want to transfer to your iPhone.
- Click “Open” to start the transfer process.
Wait for the transfer to finish. Your music will now be available on your iPhone. This method is much faster and more reliable than trying to figure out how to transfer music from iPod to iPhone via Bluetooth.
Using Cloud Services
Transferring music between devices can seem tricky. But using cloud services makes it simple. You can easily transfer music from iPod to iPhone for free. Here’s how to do it using cloud services.
Upload Music From Ipod To Cloud
First, you need to upload your music from your iPod to the cloud. This step ensures your music is safely stored online. You can then access it from your iPhone. Follow these steps:
- Ensure you have a reliable Wi-Fi connection. This makes the upload process smooth and fast.
- Choose a cloud service. Popular options include iCloud, Google Drive, Dropbox, and OneDrive.
Let’s use iCloud as an example:
- Open the iTunes app on your computer.
- Connect your iPod to the computer using a USB cable.
- Select your iPod device in iTunes.
- Go to the Music tab and check the box for Sync Music.
- Click Apply to start the sync process.
- After syncing, go to iCloud Music Library in the iTunes settings and enable it.
Your music will now upload to iCloud. This process may take some time depending on the number of songs.
Download Music To Iphone From Cloud
Once your music is in the cloud, you can download it to your iPhone. Follow these steps:
- Ensure your iPhone is connected to Wi-Fi.
- Open the Music app on your iPhone.
- Sign in with the same Apple ID you used for iCloud.
To download your music:
- Go to the Library tab in the Music app.
- Tap on Downloaded Music to see your available songs.
- Click the Download button next to the songs or albums you want.
Your music will start downloading to your iPhone. This allows you to enjoy your favorite tunes anywhere, even offline.
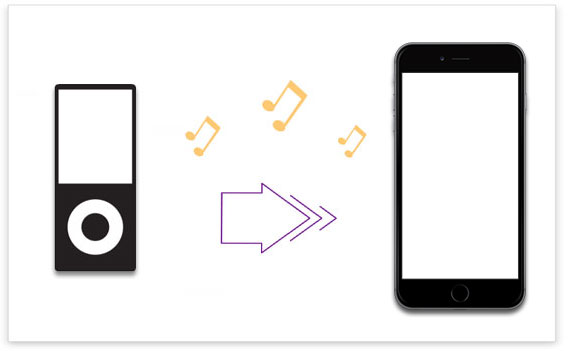
Using cloud services is an easy way to transfer music from iPod to iPhone for free. It keeps your music safe and accessible on any device.
Considerations
Transferring music from an iPod to an iPhone can be a bit tricky. There are several important considerations to keep in mind. These include compatibility issues, storage capacity, and file formats. Addressing these aspects will ensure a smooth transfer process.
Compatibility Issues
Before transferring music from an iPod to an iPhone, check the compatibility between devices. Not all iPods and iPhones support the same software versions. Some older iPods might not be compatible with the latest iPhones like the iPhone 14.
Here are some common compatibility issues:
- iOS Version: Ensure both devices run on compatible iOS versions.
- iTunes Version: The iTunes version on your computer should support both devices.
- Connection Type: Older iPods use the 30-pin connector, while iPhones use the Lightning connector.
Check the table below for a quick compatibility reference:
| Device | Connector Type | Supported iOS |
|---|---|---|
| iPod Classic | 30-pin | Up to iOS 6 |
| iPod Touch | Lightning | Up to iOS 15 |
| iPhone 14 | Lightning | iOS 16+ |
Ensuring compatibility will prevent data transfer issues and save time.
Storage Capacity
Storage capacity is another critical factor. iPods and iPhones come with different storage options. Before you transfer music from iPod to iPhone 14, ensure your iPhone has enough space.
Consider the following:
- Check Available Storage: Go to Settings > General > iPhone Storage to see how much space is available.
- Manage Storage: Delete unnecessary files or apps to free up space.
- Compare Capacities: Ensure the music library on your iPod fits into the available storage on your iPhone.
Here’s a simple guide:
- Check your iPod’s total music library size.
- Check your iPhone’s available storage.
- Ensure the library size is less than or equal to the available storage.
Proper storage management ensures a smooth transfer without running out of space.
File Formats
File formats can also impact the transfer process. Not all music files are compatible with both iPods and iPhones. Before transferring music from iPod to computer, check the file formats.
Common file formats include:
- MP3: Widely supported across all Apple devices.
- AAC: Default format for iTunes and Apple Music.
- WAV: High-quality but larger in size.
- AIFF: High-quality and compatible but uses more storage.
Convert incompatible files to a supported format using iTunes or third-party software. Follow these steps:
- Open iTunes and select the files to convert.
- Go to File > Convert, then choose the desired format.
- Transfer the converted files from the computer to your iPhone.
Ensuring the right file formats will make the transfer process seamless and efficient.
Tips And Tricks
Transferring music from an iPod to an iPhone can seem challenging. With the right tips and tricks, you can make the process smooth and efficient. This guide will help you learn how to transfer music from iPod Nano to iPhone without losing your favorite tunes.
Backup Music Before Transferring
Before transferring your music, always create a backup. A backup ensures that your music is safe if anything goes wrong. Here are some easy steps to backup your music:
- Connect your iPod to your computer using a USB cable.
- Open iTunes and select your iPod from the device list.
- Click on File > Devices > Transfer Purchases.
- Wait for the transfer to complete.
For non-purchased music, use third-party software like iMazing or AnyTrans. They offer simple ways to transfer and backup your entire music library.
| Software | Features |
|---|---|
| iMazing | Backup, transfer, and manage music |
| AnyTrans | Comprehensive media transfer |
Backing up your music library is crucial. It safeguards your music from accidental loss during the transfer process.
Check For Duplicates
Duplicates can clutter your music library and waste valuable space. Always check for duplicates before transferring music. Follow these steps to identify and remove duplicates:
- Open iTunes and go to your music library.
- Select File > Library > Show Duplicate Items.
- Review the list and delete unnecessary duplicates by right-clicking and selecting Delete from Library.
Using third-party tools like Tune Sweeper can also help. Tune Sweeper scans your library and automatically removes duplicates:
- Download Tune Sweeper and install it on your computer.
- Open the software and select Find Duplicates.
- Review the duplicates found and choose which ones to delete.
Keeping your library free from duplicates saves space. It also ensures a cleaner transfer to your iPhone.
Organize Music Library
Organizing your music library makes it easier to find your favorite songs. Follow these steps to organize your music efficiently:
- Create playlists based on genres, moods, or artists.
- Rename songs with proper titles and artist names.
- Add album artwork for a visually appealing library.
iTunes offers built-in features to help you organize:
- Go to your music library in iTunes.
- Select a song and right-click to choose Get Info.
- Edit the song details, including title, artist, and album art.
For a more automated approach, consider using software like MusicBrainz Picard. This tool automatically tags and organizes your music files:
- Download MusicBrainz Picard and install it.
- Open the software and add your music files.
- Use the tagging feature to automatically update song details.
Organizing your music library ensures a seamless experience. It makes the transfer from iPod Nano to iPhone more enjoyable.
Troubleshooting
Transferring music from an iPod to an iPhone can be tricky. Sometimes, things don’t go as planned. This troubleshooting guide will help you fix common issues. Learn how to transfer music from iPod to iPhone smoothly. Let’s dive in!
Failed Transfers
Failed transfers can be frustrating. Here are some tips to fix this problem:
- Check USB Cable: Ensure your USB cable is working. A faulty cable can cause transfer failures.
- Restart Devices: Sometimes, a simple restart can fix many issues. Turn off both your iPod and iPhone, then turn them back on.
- Update Software: Make sure your devices are running the latest iOS version. Outdated software can cause compatibility issues.
- Use iTunes: Open iTunes on your computer. Connect your iPod and iPhone. Follow the steps on how to transfer music from iPod to iTunes. Then, sync the music to your iPhone.
Here’s a quick table for easy reference:
| Issue | Solution |
|---|---|
| Faulty USB Cable | Replace the cable |
| Outdated Software | Update iOS |
| Device Needs Restart | Restart both devices |
Missing Songs On Iphone
Sometimes, songs don’t appear on your iPhone. Here are some steps to fix this:
- Check Sync Settings: Open iTunes. Go to your iPhone’s sync settings. Ensure all music is selected for syncing.
- Re-sync Music: Connect your iPhone to your computer. Open iTunes and re-sync your music library.
- Verify Storage: Make sure your iPhone has enough space. If it’s full, some songs won’t transfer.
- Re-download Songs: If songs are missing, try re-downloading them from the iTunes Store.
Use this checklist to ensure all steps are followed:
- Sync settings checked
- Music re-synced
- Storage verified
- Songs re-downloaded
Syncing Errors
Syncing errors can disrupt your music transfer process. Here are some solutions:
- Check Internet Connection: A stable internet connection is crucial. Make sure your Wi-Fi or data connection is strong.
- Disable Security Software: Sometimes, antivirus software can interfere with iTunes. Temporarily disable it during the transfer.
- Reset Sync History: Open iTunes. Go to Preferences > Devices > Reset Sync History. This can resolve many syncing issues.
- Reauthorize Computer: Open iTunes. Go to Account > Authorizations > Authorize This Computer. This ensures iTunes recognizes your devices.
Here’s a quick reference table:
| Issue | Solution |
|---|---|
| Weak Internet Connection | Improve Wi-Fi or data connection |
| Security Software Interference | Disable antivirus temporarily |
| Sync History Issues | Reset Sync History in iTunes |
| Authorization Problem | Reauthorize computer in iTunes |
Conclusion
Transferring music from your iPod to your iPhone is easier than you think. Follow the steps outlined in this guide. Enjoy your favorite tunes seamlessly on your new device. Keeping your music collection intact has never been so simple. Happy listening!