
How to unlock disabled iPhone, connect it to iTunes and follow the on-screen instructions. Use Recovery Mode if necessary.
A disabled iPhone can be a frustrating experience, but there are effective solutions. Connecting your iPhone to iTunes is often the first step to resolve this issue. If iTunes does not recognize the device, Recovery Mode can help. These methods ensure your iPhone gets unlocked and ready for use.
It’s important to follow the steps carefully to avoid further complications. Be sure to back up your data regularly to prevent data loss. Unlocking your iPhone is straightforward with the right guidance and tools. Remember, using official methods keeps your device secure and functional.
How to Unlock Disabled iPhone?

Introduction To Iphone Accessibility
Apple devices are known for their user-friendly design and advanced features. One crucial aspect is iPhone Accessibility. This feature ensures all users can navigate their iPhones with ease. It includes various tools and settings to help people with different needs. Let’s explore the common issues related to disabled iPhones and the importance of resolving them quickly.
The Common Issue Of Disabled Iphones
A disabled iPhone is a common problem many users face. This often happens due to multiple incorrect password attempts. When an iPhone gets disabled, users can’t access their data or apps. This can be very frustrating and inconvenient. It’s essential to understand why this issue occurs and how to fix it.
| Common Reasons | Description |
|---|---|
| Multiple Incorrect Passwords | Entering the wrong password too many times. |
| Software Glitches | Errors in the iOS system causing lockout. |
| Security Measures | Apple’s feature to protect user data. |
Importance Of Quick Resolution
Resolving a disabled iPhone quickly is very important. Users rely on their phones for daily activities. A disabled iPhone can cause delays and inconvenience. Quick resolution ensures users regain access to their essential data and functions.
Here are some steps to quickly unlock a disabled iPhone:
- Connect your iPhone to a computer with iTunes.
- Select your iPhone in iTunes.
- Click on “Restore iPhone”.
- Follow the on-screen instructions to complete the process.
Using these steps can help you unlock your iPhone swiftly. It ensures you can continue using your device without much delay.
Reasons Behind Iphone Being Disabled
Your iPhone can become disabled due to various reasons. Understanding these reasons helps prevent future lockouts. Read on to know the common reasons behind a disabled iPhone.
Incorrect Passcode Entries
Entering the wrong passcode multiple times will disable your iPhone. This is a security feature to protect your data.
If you forget your passcode, your iPhone will lock after six incorrect attempts. Each failed attempt increases the lockout time.
| Attempts | Lockout Time |
|---|---|
| 1-5 | No lockout |
| 6 | 1 minute |
| 7 | 5 minutes |
| 8 | 15 minutes |
| 9 | 60 minutes |
| 10 | Disabled |
Security Features Of Ios
iOS has several security features to protect your device. One such feature is the automatic disabling of the iPhone after repeated incorrect passcode entries.
Another feature is “Erase Data,” which erases all data after ten failed attempts. This feature ensures your data remains secure even if someone tries to hack your iPhone.
Enable “Erase Data” by going to Settings > Face ID & Passcode > Erase Data. Always keep a backup of your data to avoid loss.
Immediate Steps To Take When Your Iphone Is Disabled
Discovering your iPhone is disabled can be stressful. Taking immediate steps can help regain access quickly. Follow these steps to handle a disabled iPhone efficiently.
Assessing The Lock Duration
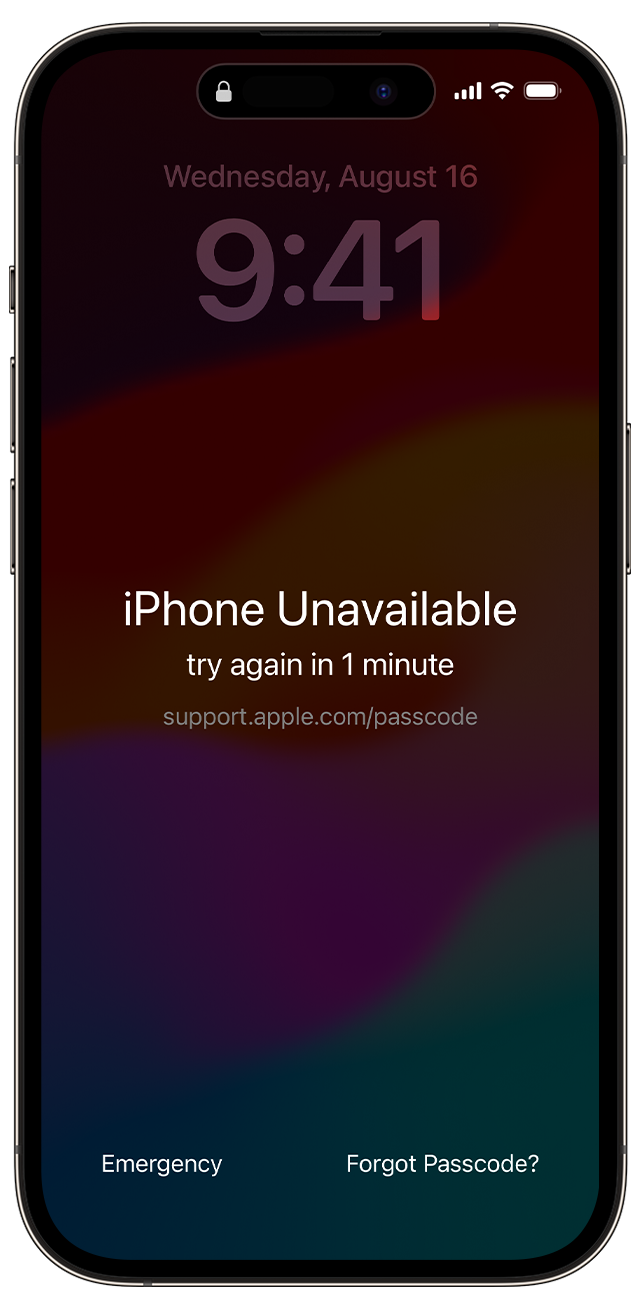
First, check the lock duration on your iPhone screen. Your iPhone may show a message like “iPhone is disabled, try again in 1 minute” or “iPhone is disabled, connect to iTunes.” The time displayed indicates how long you must wait before attempting to unlock it again.
Note the time carefully. Trying to unlock too soon can extend the lock duration. For example, if it says “try again in 5 minutes,” set a timer to remind you when to try again.
Avoiding Further Disabling Attempts
Repeated failed attempts can worsen the situation. Avoid making multiple guesses if you are unsure of your passcode. Each incorrect attempt increases the lock duration significantly. Here’s a quick guide to prevent further disabling:
- Wait for the lock duration to end before trying again.
- Use a trusted device or location to unlock your iPhone.
- Consider using recovery mode if you forgot your passcode.
To enter recovery mode:
- Connect your iPhone to a computer.
- Open iTunes or Finder on the computer.
- Follow the prompts to restore your iPhone.
Ensure you have a backup before restoring. This will help you avoid data loss. If unsure, seek professional assistance.
Itunes Method: Traditional Recovery
Unlocking a disabled iPhone may seem daunting. The iTunes Method: Traditional Recovery offers a reliable solution. This method involves using iTunes to restore your iPhone. It’s a straightforward process. You need a computer with iTunes installed.
Connecting To Itunes
First, ensure your computer has the latest version of iTunes. Open iTunes on your computer. Use a USB cable to connect your iPhone to the computer. iTunes will detect your iPhone automatically.
| Step | Action |
|---|---|
| 1 | Update iTunes on your computer. |
| 2 | Open iTunes. |
| 3 | Connect your iPhone using a USB cable. |
| 4 | Wait for iTunes to detect your device. |
Restoring Iphone Via Itunes
Once iTunes detects your iPhone, follow these steps to restore:
- Select your iPhone in iTunes.
- Click on the Summary tab.
- Click on Restore iPhone.
- Confirm your choice by clicking Restore again.
iTunes will start restoring your iPhone to factory settings. This process may take some time. Ensure your iPhone stays connected during the process. Once the restore is complete, your iPhone will restart. You can then set up your iPhone as new or restore from a backup.
Using the iTunes Method is one of the most effective ways to unlock a disabled iPhone. It is simple and doesn’t require any special tools.
Using Find My Iphone For Remote Erasing
If your iPhone is disabled, you can use Find My iPhone to erase it remotely. This method is effective and can be done from any internet-connected device. Follow these simple steps to unlock your disabled iPhone.
Accessing Find My Online
To start, access the Find My iPhone service online. Visit iCloud’s Find My iPhone page. Log in using your Apple ID and password.
Once logged in, you will see a map showing all your Apple devices. Select your disabled iPhone from the list. This will bring up more options.
Initiating A Remote Wipe
After selecting your iPhone, click on the Erase iPhone option. This will start the remote wipe process. Confirm your decision when prompted.
Wait for the erasing process to complete. Your iPhone will be reset to its factory settings. You can then set it up as new or restore it from a backup.
Recovery Mode: Solving Without Itunes
Unlocking a disabled iPhone can be a challenging task. Fortunately, recovery mode offers a solution. This method works without the need for iTunes. Follow these simple steps to regain access to your device.
Entering Recovery Mode
To start, you need to enter recovery mode. Here are the steps:
- Turn off your iPhone completely.
- Connect your iPhone to a computer using a USB cable.
- Press and hold the correct button for your iPhone model:
| iPhone Model | Button to Hold |
|---|---|
| iPhone 8 or later | Volume Up + Power Button |
| iPhone 7 and 7 Plus | Volume Down + Power Button |
| iPhone 6s and earlier | Home Button + Power Button |
Keep holding the buttons until you see the recovery mode screen. This screen shows a computer icon and a USB cable.
Restoring Through Recovery Mode
Once in recovery mode, you can restore your iPhone. Follow these steps:
- Your computer should detect the iPhone in recovery mode.
- A pop-up message will appear on your computer screen.
- Choose the option to Restore your iPhone.
- Wait for the process to complete. This may take a few minutes.
- Once done, set up your iPhone as new or restore from a backup.
Using recovery mode is an effective way to unlock a disabled iPhone. This method does not require iTunes. Follow the steps carefully for the best results.
Third-party Tools And Services
Unlocking a disabled iPhone can be challenging. Third-party tools and services provide a reliable solution. These tools help bypass the lock screen and regain access to your device. It is essential to choose the right software to ensure safety and effectiveness.
Choosing Reliable Software
Not all third-party tools are created equal. It is crucial to select software from reputable sources. Look for reviews and user feedback before making a decision. Ensure the software is compatible with your iPhone model and iOS version.
| Software | Compatibility | Price | Reviews |
|---|---|---|---|
| Tenorshare 4uKey | iOS 7.0 – 14.0 | $35.95 | 4.5/5 |
| Dr.Fone – Unlock | iOS 7.0 – 14.0 | $39.95 | 4.3/5 |
| iMyFone LockWiper | iOS 7.0 – 14.0 | $29.95 | 4.6/5 |
Steps For Using Third-party Tools
- Download and install the chosen software on your computer.
- Connect your disabled iPhone to the computer using a USB cable.
- Launch the software and follow the on-screen instructions.
- Select the appropriate mode to unlock your iPhone.
- Wait for the software to complete the unlocking process.
Using third-party tools can be effective. Always ensure your data is backed up before proceeding. This will help prevent any data loss during the unlocking process.
After The Fix: Restoring Iphone Data
Once you’ve fixed your disabled iPhone, restoring your data is crucial. This ensures you regain access to your contacts, photos, and apps. There are two main options: restoring from a backup or setting up your iPhone as a new device.
Restoring From Backup
If you’ve previously backed up your iPhone, you can easily restore your data. This process is simple and quick. Here’s how:
- Connect your iPhone to a computer.
- Open iTunes or Finder.
- Select your device.
- Click “Restore Backup”.
- Choose the most recent backup.
- Click “Restore”.
Your iPhone will now restore your apps, settings, and files from the backup. This method saves time and ensures you don’t lose any important data.
Setting Up As A New Device
If you prefer a fresh start, you can set up your iPhone as a new device. This means you won’t restore any previous data. Follow these steps:
- Turn on your iPhone.
- Follow the on-screen setup instructions.
- Choose “Set Up as New iPhone”.
- Sign in with your Apple ID.
- Customize your settings.
Setting up as a new device can help if your old data caused issues. It’s a clean slate for a fresh start.
| Method | Pros | Cons |
|---|---|---|
| Restore from Backup | Quick, retains data | May restore old issues |
| Set Up as New Device | Fresh start, no old issues | Lose old data |
Both methods have their benefits. Choose the one that best fits your needs.
Preventive Measures For The Future
Unlocking a disabled iPhone can be stressful. Preventing this issue is crucial. Implementing some preventive measures will save you time and worry. Below are steps to keep your iPhone accessible.
Creating Complex Passcodes
A simple passcode is easy to guess. Create a complex passcode to secure your iPhone. Use a combination of numbers, letters, and symbols. Here are some tips for a strong passcode:
- Use at least 8 characters.
- Combine uppercase and lowercase letters.
- Include numbers and special symbols.
- Avoid using easily guessable info like birthdays.
Regular Data Backups
Backing up your data regularly is essential. This ensures you won’t lose important information. There are two main ways to back up your iPhone:
| Backup Method | Details |
|---|---|
| iCloud Backup | Automatically backs up daily over Wi-Fi. Ensure you have enough iCloud storage. |
| iTunes Backup | Connect your iPhone to a computer. Use iTunes to back up manually. |
Follow these steps to back up with iCloud:
- Go to Settings.
- Tap on your name.
- Select iCloud.
- Tap iCloud Backup.
- Turn on iCloud Backup.
To back up with iTunes, do this:
- Connect your iPhone to a computer.
- Open iTunes.
- Select your device.
- Click Back Up Now.
Regular backups ensure your data is safe. You can restore it if your iPhone gets disabled.
Understanding Legal And Ethical Considerations
Unlocking a disabled iPhone involves more than just technical steps. Legal and ethical considerations are crucial. These factors ensure you stay on the right side of the law. They also respect the privacy and rights of others.
When To Seek Professional Help
Sometimes, unlocking a disabled iPhone can be complex. Professional help might be necessary in such cases. Experts have the tools and knowledge to do it safely.
Benefits of seeking professional help include:
- Ensuring the process is legal
- Protecting your phone’s data
- Minimizing the risk of further issues
| Scenario | Action |
|---|---|
| Forgotten passcode | Consult a professional |
| Phone is locked due to software issue | Seek expert help |
Respecting Privacy And Legality
Unlocking someone else’s iPhone without permission is illegal. Always respect privacy and ownership rights. Ensure you have legal ownership or permission from the owner.
Actions to maintain legality and respect privacy:
- Verify ownership before attempting to unlock
- Use official methods provided by Apple
- Avoid third-party software that might compromise security
Remember, respecting privacy and legality protects you and others.
Conclusion
Unlocking a disabled iPhone might seem challenging, but it’s manageable with the right steps. Following our guide ensures a smooth process. Remember to back up your data regularly to avoid potential loss. With patience and the correct tools, your iPhone will be functional again in no time.
Stay proactive and keep your device secure.