
How to scan using iPhone, open the Notes app and use the built-in document scanner. Position the document and capture the scan.
Scanning documents with an iPhone is straightforward and convenient. The Notes app offers a built-in scanner feature that eliminates the need for third-party apps. This functionality is especially useful for quickly digitizing receipts, contracts, and other important papers. The process is simple: just open the Notes app, create a new note, and select the camera icon to find the “Scan Documents” option.
Align the document within the frame, and the iPhone will automatically capture the scan. You can adjust the corners, apply filters, and save the scanned document directly to your notes. This makes document management easy and efficient, right from your iPhone.
How to Scan Using iPhone?

Introduction To Iphone Scanning
In the digital age, scanning documents has become a necessity. With an iPhone, scanning is easier than ever. This guide will help you understand how to scan using an iPhone. From capturing documents to saving them, iPhones simplify the process.
The Convenience Of Mobile Scanning
Mobile scanning offers unmatched convenience. No need for bulky scanners. Your iPhone fits in your pocket and can scan documents anywhere. This feature is perfect for students, professionals, and everyone in between. Simply open the app and point your camera. In seconds, your document is scanned.
Mobile scanning also saves time. There’s no need to transfer files from a scanner to your computer. Just save the scanned document directly on your phone. You can email, print, or share it instantly. This seamless process makes mobile scanning incredibly efficient.
Evolution Of Iphone Camera Capabilities
The iPhone camera has evolved significantly. Early iPhones had basic cameras. They could take photos but struggled with details. Today, iPhones have advanced cameras capable of high-resolution scans.
With each new model, the camera quality improves. The latest iPhones feature multiple lenses and enhanced sensors. These advancements ensure clear, detailed scans every time. The camera’s ability to capture fine details makes it ideal for document scanning.
Software improvements also play a role. iOS updates continually enhance the camera’s functionality. Features like auto-focus and image stabilization ensure sharp, clear scans. These improvements make the iPhone a powerful scanning tool.
Comparison Table: Iphone Camera Evolution
| iPhone Model | Camera Megapixels | Scanning Quality |
|---|---|---|
| iPhone 4 | 5 MP | Basic |
| iPhone 6 | 8 MP | Better |
| iPhone X | 12 MP | Excellent |
| iPhone 13 | 12 MP (Multiple Lenses) | Outstanding |
Essential Tools For Iphone Scanning
Scanning documents with an iPhone is easy. With the right tools, it gets even better. Let’s explore the essential tools for iPhone scanning.
Native Iphone Scanning Apps
The iPhone comes with built-in scanning apps. These native apps are user-friendly and efficient.
- Notes App: The Notes app can scan documents. Open a note, tap the camera icon, then choose “Scan Documents”. It’s simple and quick.
- Files App: The Files app also supports scanning. Open the app, tap the three dots, then select “Scan Documents”. This feature helps organize scanned files easily.
Third-party Scanning Applications
Third-party apps offer advanced scanning features. They provide enhanced functionalities compared to native apps.
| App Name | Key Features |
|---|---|
| CamScanner | OCR, cloud sync, and sharing options. |
| Adobe Scan | Auto-capture, image enhancement, and PDF export. |
| Genius Scan | Batch scanning and smart document detection. |
These apps help users scan documents efficiently. They offer more features than native iPhone scanning apps.
Preparing Your Document For Scanning
Scanning documents with your iPhone can be very convenient. The process is simple, but preparing your document correctly is crucial. Proper preparation ensures that the scanned document is clear and legible.
Choosing The Right Environment
Find a well-lit area for scanning. Natural light is best, but a bright lamp can work too. Avoid shadows on the document. Shadows can make parts of your document hard to read.
Use a flat, clean surface. A desk or table works well. Avoid scanning on uneven or dirty surfaces. This can affect the quality of the scan.
Ensuring Document Clarity
Make sure your document is flat and smooth. Remove any wrinkles or folds. A smooth document scans better. Use a paperweight if needed to keep it flat.
Check for any stains or marks. Clean the document if necessary. Smudges can reduce clarity. You want the text to be readable.
Use a ruler to align the document. Keep it straight. Crooked documents can result in a poor scan. Aligning helps the iPhone’s scanner capture everything correctly.
| Step | Action |
|---|---|
| 1 | Find a well-lit area |
| 2 | Use a flat, clean surface |
| 3 | Ensure the document is flat |
| 4 | Check for stains and clean |
| 5 | Align the document with a ruler |
Following these steps ensures your document is ready for scanning. A well-prepared document results in a clear and professional scan.
Step-by-step Guide To Scanning With Iphone
Scanning documents with your iPhone is easy and quick. Follow these simple steps to scan documents using your iPhone. Each step will guide you through the process.
Opening Your Scanning App
First, open the Notes app on your iPhone. Tap the New Note button at the bottom right corner. In the new note, tap the Camera icon.
A menu will appear. Select Scan Documents. Your camera will open, ready to scan your document.
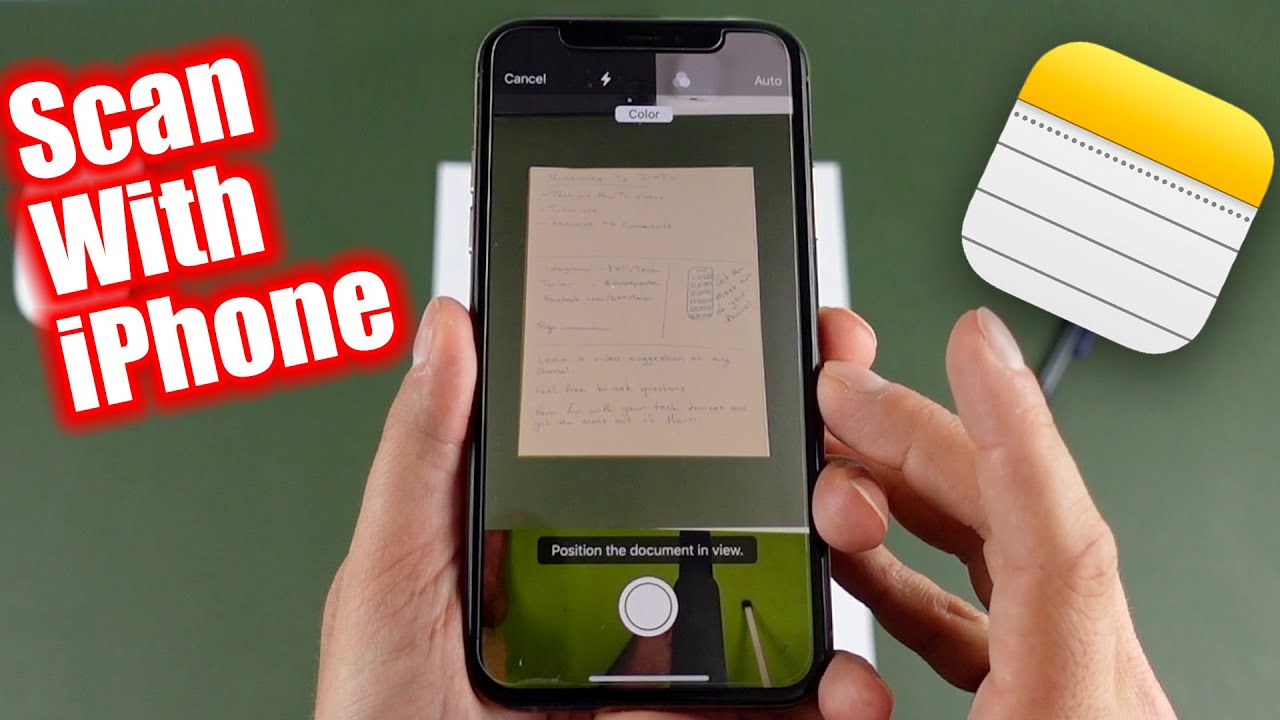
Positioning Your Iphone Correctly
Hold your iPhone steady over the document. Make sure the document fits within the camera frame. Avoid shadows and ensure good lighting.
Use a flat surface for the document. If needed, adjust the distance to get the best view.
Capturing The Document
Once positioned, your iPhone will automatically detect the edges. A yellow box will appear around the document.
Tap the Capture button or let the iPhone auto-capture. Adjust the corners if needed by dragging the circles.
Click Keep Scan to save the document. Repeat the steps for multiple pages.
Follow these steps to easily scan documents with your iPhone. Happy scanning!
Editing Scanned Documents
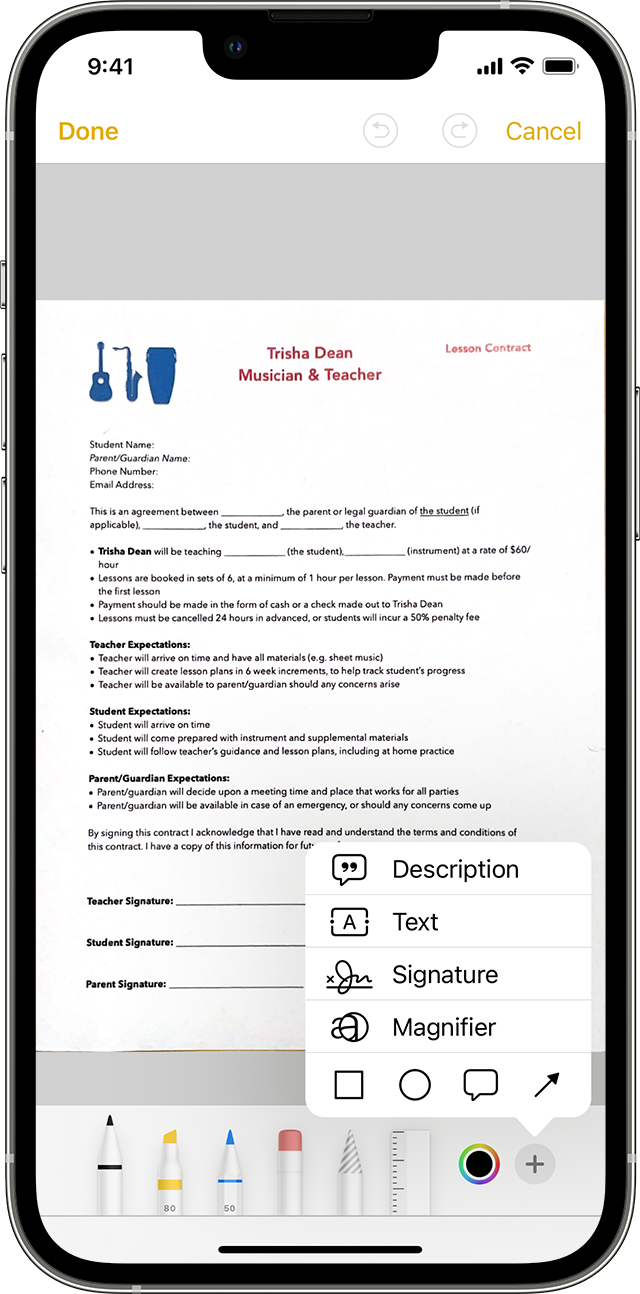
Editing scanned documents on your iPhone is easy and quick. You can adjust color, brightness, crop, and align your scans. Here’s how to make your scanned documents look perfect.
Adjusting Color And Brightness
Open your scanned document in the Notes app. Tap on the scanned document you want to edit. You will see options to adjust color and brightness.
- Tap on the Color Filters option to change the color scheme.
- You can choose from Color, Grayscale, and Black & White.
- Use the Brightness Slider to make your document lighter or darker.
Cropping And Alignment Tips
To crop and align your scanned document, follow these steps:
- Open your scanned document in the Notes app.
- Tap on the Edit button.
- Drag the corners to crop the document to the desired size.
- Use the grid lines to ensure the document is aligned properly.
Follow these tips to make your scanned documents look professional and clean. With just a few taps, your scans will be perfect.
Saving And Sharing Your Scanned Documents
After scanning documents with your iPhone, it’s important to save and share them properly. Knowing the best formats and methods will ensure your files are accessible and easy to share.
File Format Options
iPhone scans can be saved in various formats. The most common formats are:
- PDF: Ideal for documents, as they are universally accepted.
- JPEG: Great for images, offering high-quality resolution.
- PNG: Another image format, often used for graphics.
Choose the format based on your needs. PDFs are best for text documents. JPEGs and PNGs are suited for images.
Using Cloud Storage
Storing your scanned documents in the cloud ensures they are safe and accessible. Popular cloud storage options include:
- iCloud: Apple’s built-in service for easy access on all Apple devices.
- Google Drive: Offers generous free storage and easy sharing.
- Dropbox: Known for its simplicity and reliability.
Saving to the cloud keeps your documents secure and easy to share. Just upload your scans directly from your iPhone.
Sending Documents Via Email Or Messaging Apps
Sharing scanned documents is simple with email or messaging apps. Here’s how to do it:
- Open the scanned document on your iPhone.
- Tap the Share button.
- Select Email or your preferred messaging app.
- Enter the recipient’s details and send.
Email is great for formal sharing. Messaging apps like iMessage or WhatsApp work for quick, casual sharing.
Advanced Scanning Features
With the advancements in technology, scanning has evolved significantly. The iPhone now offers a range of advanced scanning features. These features make scanning documents easier and more efficient. Below, we explore some of the most notable advanced features.
Ocr Technology In Scanning
Optical Character Recognition (OCR) is a powerful tool. It allows your iPhone to convert scanned text into editable text. This means you can copy and paste text directly from your scans. OCR technology is especially useful for digitizing printed documents.
To use OCR, simply scan your document using the iPhone camera. The OCR feature will process the text automatically. You can then edit or share the text as needed. This feature saves time and enhances productivity.
Multi-page Document Scanning
Scanning multiple pages into a single document is now possible. The iPhone makes this process simple and efficient. You can scan each page one by one. The app will then compile all pages into a single document.
Here’s how to scan multi-page documents:
- Open the scanning app on your iPhone.
- Scan the first page of your document.
- Tap the “Add Page” button to scan additional pages.
- Repeat until all pages are scanned.
- Save the compiled document as a PDF.
This feature is perfect for creating digital copies of lengthy documents.
It ensures all pages are stored together. This makes it easy to manage and share comprehensive documents.
| Feature | Description |
|---|---|
| OCR Technology | Converts scanned text into editable text. |
| Multi-page Scanning | Compiles multiple scanned pages into one document. |
These advanced features make the iPhone a powerful scanning tool. They save time and enhance productivity. Utilize these features to get the most out of your iPhone’s scanning capabilities.
Troubleshooting Common Scanning Issues
Scanning with an iPhone is usually simple. Yet, some common issues can arise. This section will help you solve these problems. Follow these tips to improve your scanning experience.
Dealing With Poor Lighting
Poor lighting can make your scans look bad. Here are some ways to fix this:
- Use natural light: Find a spot with good sunlight.
- Avoid shadows: Make sure no shadows fall on your document.
- Use a lamp: Place a lamp close to your document.
- Adjust brightness: Use the iPhone’s editing tools to enhance brightness.
Reducing Blur And Smudges
Blurry or smudged scans are hard to read. Follow these steps to avoid them:
- Hold your phone steady: Use both hands for stability.
- Use a stand: Place your iPhone on a stable stand.
- Clean your lens: Wipe the iPhone’s camera lens before scanning.
- Keep your document flat: Make sure the document is not wrinkled.
Handling Scanning Errors
Sometimes, scanning apps may show errors. Here’s how to handle them:
- Restart the app: Close and reopen the scanning app.
- Update the app: Ensure you have the latest version installed.
- Check for iOS updates: Update your iPhone’s software.
- Reinstall the app: Delete and reinstall the scanning app.
If these steps do not work, contact the app’s support team for help.
Maximizing Productivity With Iphone Scanning
Using your iPhone for scanning can greatly increase your productivity. This powerful tool can help you create a more efficient workflow. Below, we explore how to maximize productivity with iPhone scanning.
Creating A Document Management System
Organize your scanned documents into a structured system. This allows easy retrieval and management. Follow these steps:
- Create folders for different categories.
- Use descriptive names for your files.
- Regularly backup your documents to the cloud.
Consider using tags to further organize your files. This makes it easier to find specific documents quickly.
Integrating With Productivity Apps
Enhance your workflow by integrating scanned documents with productivity apps. Many apps can sync with your iPhone’s scanning features. Here are a few:
| App | Function |
|---|---|
| Evernote | Note-taking and organizing |
| Google Drive | Cloud storage and sharing |
| Trello | Project management |
Integrate your scanned documents with these apps for seamless productivity. You can also share documents directly from your iPhone. This allows you to collaborate efficiently.
Privacy And Security Considerations
Scanning documents with your iPhone is convenient. But, you must consider privacy and security. Protecting your data is crucial. Follow these guidelines to keep your information safe.
Ensuring Data Protection
Data protection is vital. Use strong passwords for your device. Enable Face ID or Touch ID for extra security. Always keep your iPhone software updated. Updates fix security issues. Avoid using public Wi-Fi while scanning. Public networks can be unsafe.
Another tip is to use encrypted storage. Many apps offer encryption. Encryption scrambles data, making it hard to read without permission. Choose apps that prioritize security.
Best Practices For Sensitive Documents
Handling sensitive documents needs care. Here are some best practices:
- Use secure apps: Choose apps known for their security features.
- Disable cloud backups: Turn off automatic cloud backups for sensitive files.
- Delete after use: Remove scanned documents from your device once done.
Keep track of who accesses your phone. Be cautious about sharing scanned documents. Use file encryption for added security. Many apps let you password-protect your files.
Consider using VPNs. VPNs add an extra layer of security. They hide your online activity. This makes it harder for hackers to access your data.
| Action | Benefit |
|---|---|
| Use strong passwords | Prevents unauthorized access |
| Enable Face ID/Touch ID | Enhances security |
| Keep software updated | Fixes security vulnerabilities |
| Use encrypted storage | Protects data from unauthorized access |
| Use VPNs | Hides online activity |
Following these steps helps keep your scanned documents safe. Prioritize privacy and security to protect your sensitive information.
Conclusion
Mastering scanning with your iPhone is simple and efficient. Follow the steps outlined to enhance your productivity. Enjoy the convenience of having a portable scanner in your pocket. Regular practice will make you proficient. Share your newfound skills with friends and family.
Happy scanning with your iPhone!