
How to scan documents with iPhone, use the Notes app. Open a note, tap the camera icon, and select “Scan Documents.”
Scanning documents with your iPhone is simple and efficient. The built-in Notes app provides a convenient way to digitize paper documents. This feature eliminates the need for third-party apps or dedicated scanners. Whether you need to scan receipts, contracts, or handwritten notes, your iPhone can handle it.
The scanned documents can be saved as PDFs or images, making them easy to share via email or messaging apps. Additionally, the Notes app offers basic editing tools to enhance the scanned image. This functionality ensures you have clear, readable digital copies of important documents at your fingertips.
How to Scan Documents With iPhone?
Getting Started
Scanning documents with your iPhone has never been easier. With just a few taps, you can digitize important papers. This guide will walk you through the necessary steps to get started.
Required Tools
To scan documents with your iPhone, you need the following tools:
- iPhone with a camera
- Notes App or a third-party scanning app
- Good lighting for clear scans
Ios Version Compatibility
Ensure your iPhone is running iOS 11 or later. Scanning is built into the Notes app from iOS 11 onwards. To check your iOS version:
- Open the Settings app.
- Tap on General.
- Select About.
- Look for the Software Version.
If your device isn’t compatible, consider updating your iOS or using a third-party scanning app.
Using The Notes App
Scanning documents with your iPhone is very easy. The Notes app is a great tool for this. It is already on your iPhone. You do not need any other app. Follow these steps to scan documents quickly.
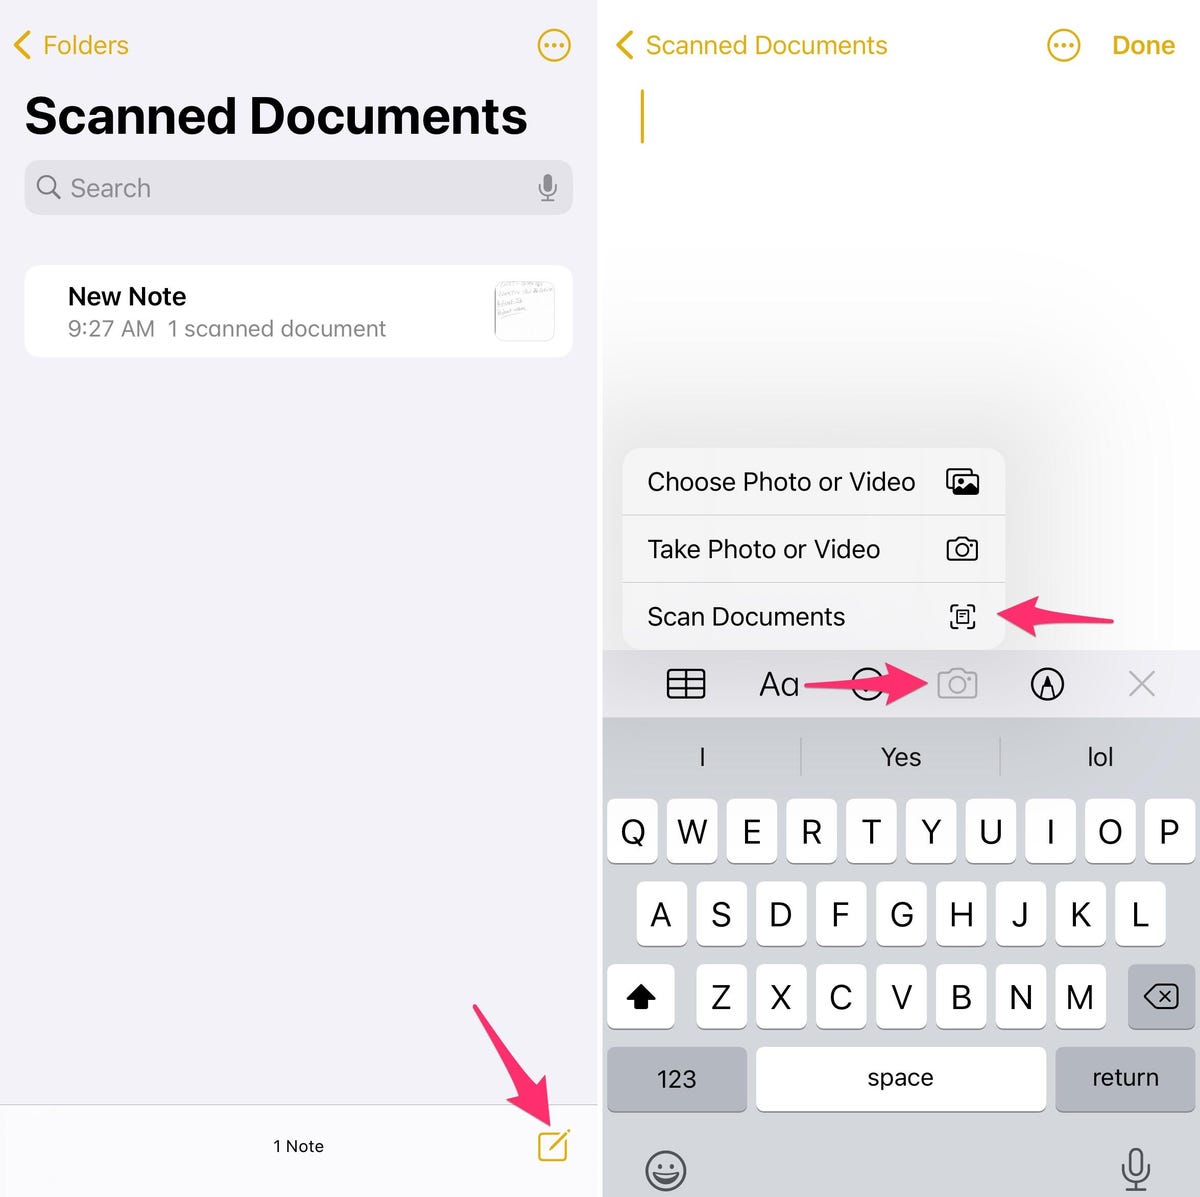
Opening The Notes App
First, find the Notes app on your iPhone. It looks like a yellow and white notebook. Tap on the app to open it. You are now ready to start scanning.
Creating A New Note
Next, create a new note. Tap the create new note button. It looks like a square with a pencil. This will open a blank note. You can now add your scanned documents here.
Activating The Scanner
Now, you need to activate the scanner. Tap the camera icon. It is at the bottom of the screen. Choose “Scan Documents” from the menu. This will open the camera. Hold your iPhone over the document. The camera will detect the edges of the paper. Tap the button to take a picture. The app will scan the document. Adjust the corners if needed. Tap “Keep Scan” to save it. Repeat for more pages. Tap “Save” when finished.
Now you have scanned a document using the Notes app. It is saved in your new note. You can share it, print it, or save it to other apps.
Scanning Documents
Do you need to scan a document quickly? Your iPhone can help! With your iPhone, scanning documents is easy. You don’t need a separate scanner. Use your iPhone camera to capture clear scans.
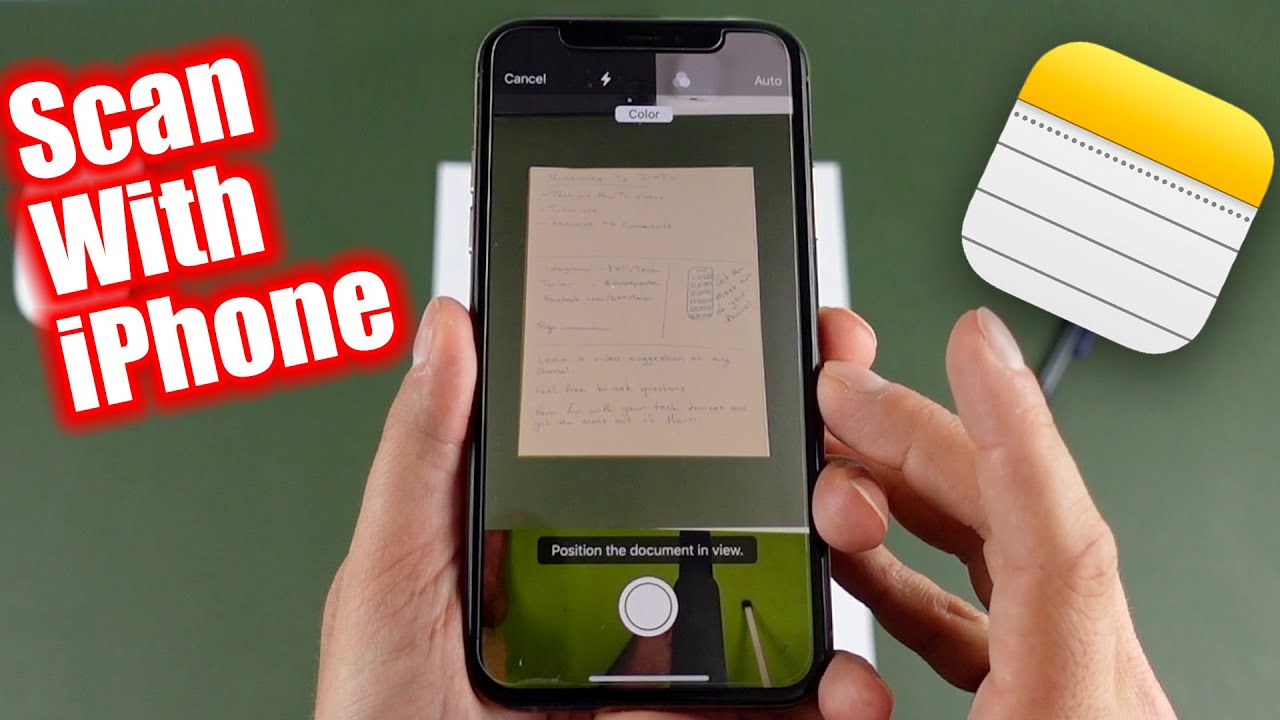
Positioning Your Document
First, place your document on a flat surface. Ensure good lighting in the room. Avoid shadows on the document. Open the Notes app on your iPhone. Tap the camera icon, then select “Scan Documents.” Position your iPhone directly above the document. Keep your hands steady. Make sure the document fits within the screen.
Capturing The Scan
Once your document is positioned, the iPhone will detect it. A yellow box will appear around the document. Tap the shutter button to capture the scan. Your iPhone will automatically adjust the scan. If needed, you can manually capture the scan by tapping the shutter button. This ensures you get the best quality scan.
Adjusting Corners
After capturing the scan, you might need to adjust corners. The iPhone allows you to drag the corners to align the scan. This helps in getting a perfect scan. Ensure all text and images are within the borders. Once satisfied, tap “Keep Scan.” You can scan additional pages or save the document.
| Step | Action |
|---|---|
| 1 | Open the Notes app |
| 2 | Tap the camera icon |
| 3 | Select “Scan Documents” |
| 4 | Position your document |
| 5 | Tap the shutter button |
| 6 | Adjust corners if needed |
| 7 | Save the scan |
Scanning documents with your iPhone is easy and quick. Follow these steps to get perfect scans every time. Happy scanning!
Editing Scanned Documents
Once you’ve scanned a document with your iPhone, you may need to edit it. Editing helps improve the document’s clarity and readability. This section will guide you through applying filters, cropping and rotating, and adding annotations to your scanned documents.
Applying Filters
Filters enhance the appearance of your scanned documents. You can make the text clearer and more legible. Follow these simple steps:
- Open the scanned document in your iPhone.
- Tap on the Edit button.
- Select the Filters option.
- Choose from options like Grayscale or Black & White.
- Preview the filter and tap Apply.
Cropping And Rotating
Cropping and rotating help you focus on important parts of the document. They also ensure proper orientation. Follow these steps:
- Open the scanned document.
- Tap on the Edit button.
- Select the Crop tool.
- Drag the corners to crop the document.
- Tap on the Rotate button if needed.
- Tap Done to save changes.
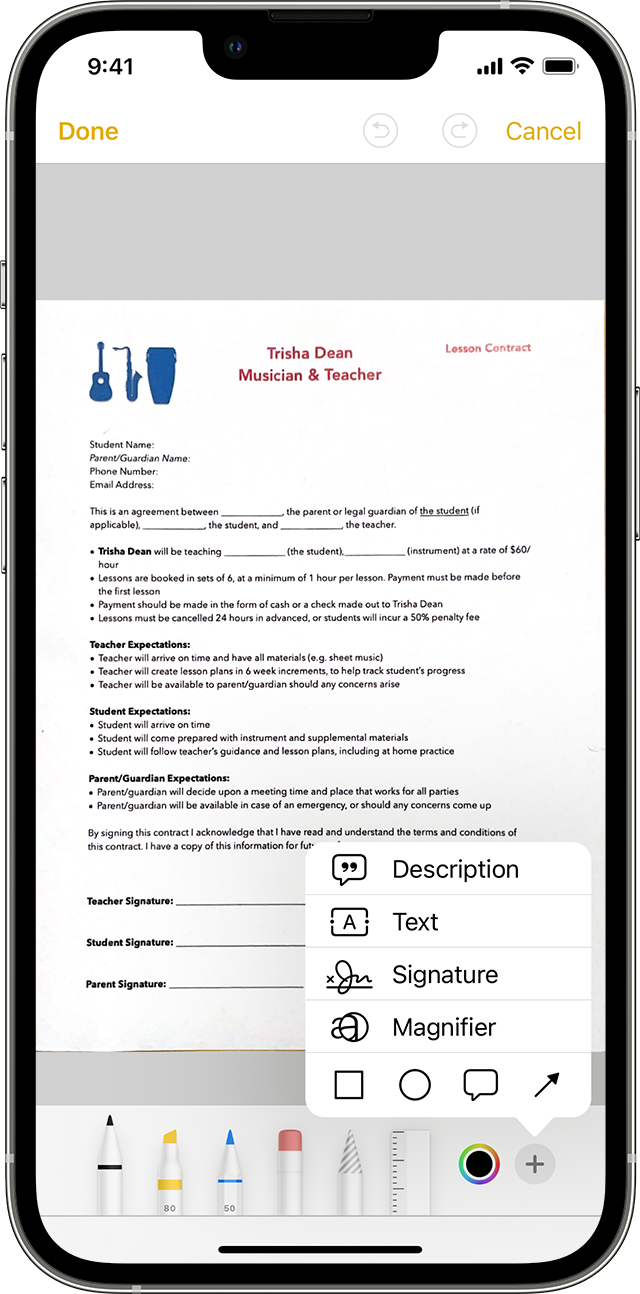
Adding Annotations
Annotations allow you to add notes or highlight important text. This is useful for study or work. Here’s how to add annotations:
- Open the scanned document.
- Tap on the Edit button.
- Select the Annotate tool.
- Choose a pen, marker, or text tool.
- Add your notes or highlights to the document.
- Tap Done to save annotations.
Editing your scanned documents can make them more useful. These features help you get the best results from your iPhone scans.
Saving And Sharing
Scanning documents with your iPhone is easy and efficient. After scanning, you need to save and share these documents. Below, we explore how to save and share scanned documents using different methods.
Saving To Files
After scanning your document, saving to Files is simple. Follow these steps:
- Open the scanned document.
- Tap the Share button.
- Select Save to Files.
- Choose your desired folder.
- Tap Save.
This saves the document to your iPhone’s Files app. You can access it anytime.
Sharing Via Email
Sharing your document via email is quick. Follow these steps:
- Open the scanned document.
- Tap the Share button.
- Select Mail.
- Enter the recipient’s email address.
- Tap Send.
Your document is now shared via email. The recipient can view or download it.
Uploading To Cloud Storage
Uploading to cloud storage ensures your document is safe. Follow these steps:
- Open the scanned document.
- Tap the Share button.
- Select your preferred cloud service (e.g., iCloud Drive, Google Drive).
- Choose the desired folder.
- Tap Upload.
Your document is now stored in the cloud. You can access it from any device.
Using Third-party Apps
Using third-party apps can make scanning documents with your iPhone a breeze. These apps offer additional features that the built-in options might lack. From high-quality scans to advanced editing tools, third-party apps bring more functionality to your fingertips.
Popular Scanning Apps
Several apps stand out for their ease of use and powerful features. Here are some popular ones:
- Camscanner: Known for its user-friendly interface.
- Adobe Scan: Integrates well with other Adobe products.
- Microsoft Office Lens: Perfect for converting scans to Word or PDF.
Advanced Features
These apps offer advanced features that make scanning easier and more efficient:
- OCR (Optical Character Recognition): Convert scanned images into editable text.
- Cloud Integration: Save your scans directly to cloud services like Dropbox or Google Drive.
- Batch Scanning: Scan multiple pages quickly and save them as a single file.
Subscription Plans
Many of these apps offer free versions, but premium features often require a subscription. Here’s a quick comparison:
| App | Free Version | Premium Version |
|---|---|---|
| Camscanner | Basic scanning and saving | Advanced OCR and cloud storage |
| Adobe Scan | Basic scanning | Enhanced editing and sharing |
| Microsoft Office Lens | Basic scanning and conversion | Integration with Office 365 |
Troubleshooting Tips
Scanning documents with your iPhone is usually easy, but issues can arise. This section provides troubleshooting tips to help you solve common problems. You’ll learn how to fix issues, improve scan quality, and update your software.
Common Issues
Sometimes, the iPhone camera does not focus properly. This can make your scans blurry. Ensure your camera lens is clean. Use a soft cloth to wipe the lens.
Another issue is bad lighting. Scanning in low light can affect the quality. Find a well-lit area for better results.
If your scanned documents are not saving, check your storage. Make sure you have enough space on your iPhone.
Improving Scan Quality
To improve scan quality, hold your iPhone steady. Use a flat surface to place your document. This helps in capturing a clear image.
Use the grid feature in the camera app. This helps you align the document correctly. Proper alignment prevents skewed scans.
Adjust the brightness settings if needed. This can make text clearer and more readable.
Updating Software
Outdated software can cause scanning issues. Ensure your iPhone has the latest iOS version. Follow these steps to update:
- Go to Settings on your iPhone.
- Tap General, then Software Update.
- If an update is available, tap Download and Install.
Updating your apps is also important. Go to the App Store and update all your apps. This ensures you have the latest features and bug fixes.
Conclusion
Scanning documents with your iPhone is simple and efficient. Follow the steps we’ve outlined for the best results. This method saves time and ensures your documents are always accessible. So, start scanning today and enjoy the convenience of having important files at your fingertips.