Can you fix a loose dental crown at home? Yes, you can do a temporary fix for a loose crown at home. This can help you manage the problem until you see a dentist. Is it a permanent fix? No, it is not. This guide will show you how to handle a loose crown or how to reattach a lost crown in an emergency. This will protect your tooth until you can get proper dental care. This is a temporary dental cement solution, not a long-term one.
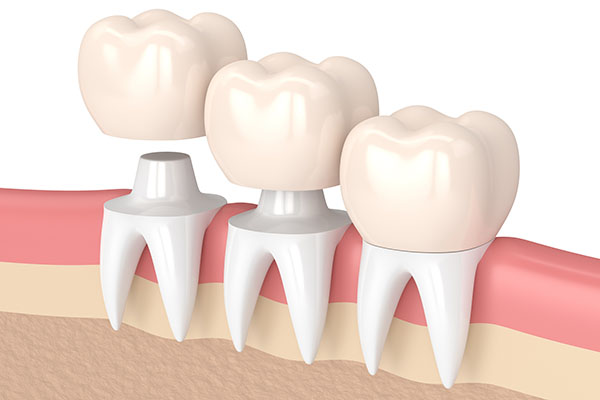
Image Source: www.ohiocosmeticdentists.com
Why Your Crown Might Come Loose
A dental crown is like a cap. It covers a damaged tooth. It helps to make your tooth strong again. Crowns are usually very tough. They last many years. But sometimes, a crown can become loose. This can happen for different reasons.
- Old Dental Cement: The glue that holds your crown on can wear out over time. It gets old and stops sticking well. This is a common reason.
- New Tooth Decay: A cavity might form under your crown. This can weaken the tooth the crown sits on. It makes the crown fit poorly. This is why good cleaning is key.
- Hard Foods: Chewing on hard candy, ice, or nuts can put a lot of stress on your crown. This can make it pop off.
- Trauma or Injury: A hit to the face can loosen or dislodge a crown.
- Grinding Teeth: If you grind your teeth at night, it can put extra force on your crowns. This can loosen them over time.
- Improper Bite: If your bite is not even, one crown might take too much pressure. This can make it loose.
When a crown is loose, your tooth underneath is exposed. This can cause pain. It can also lead to more decay. So, you need to act fast. A loose crown emergency fix is needed.
Is an At-Home Fix Safe? Deciphering the Risks
Fixing a loose crown at home is only a short-term solution. It is not meant to be a permanent repair. It is a way to protect your tooth. It also helps with pain until you can see your dentist.
Important points to remember:
- Not Permanent: An at-home fix is never as good as a dentist’s work. The temporary dental cement is not as strong as what your dentist uses.
- Risk of Further Damage: If you do not put the crown back on right, it could break. Or you could damage the tooth.
- Infection Risk: An exposed tooth can get infected. This is a serious problem. It needs a dentist.
- Need for Professional Care: You must see your dentist as soon as possible. They need to check the tooth. They will see why the crown came off. They will fix it the right way. They might need to make a new crown.
Using a DIY crown repair kit is helpful. But it is only for a few days. Think of it like a bandage. It helps until a doctor can truly fix the wound. Never use super glue or other harsh glues. These are not safe for your mouth. They can harm your tooth and gums.
Gathering Your Supplies: The DIY Crown Repair Kit
Before you try to fix your crown, get everything ready. Having all your items nearby makes the job easier. You can buy these things at most drugstores or pharmacies. Look for a dental adhesive for crowns or an over-the-counter crown glue.
Here is what you will need:
- Over-the-Counter Crown Glue (Temporary Dental Cement): This is the most important item. Look for kits specifically made for dental emergencies. They usually contain a small tube of cement.
- Why you need it: This glue is safe for your mouth. It holds the crown gently.
- Cotton Swabs or Cotton Balls: These help to clean and dry your tooth.
- Why you need them: You need a very dry surface for the glue to stick.
- Gauze Pads: Useful for wiping and absorbing saliva.
- Why you need them: Keeping the area dry is very important.
- Toothbrush and Toothpaste: For cleaning both your crown and your tooth.
- Why you need them: A clean surface helps the glue stick better.
- Dental Floss: To clean around the tooth if the crown is still somewhat attached.
- Why you need it: Helps remove food bits.
- Small Mirror: A magnifying mirror is best. This helps you see what you are doing.
- Why you need it: It is hard to work in your mouth without seeing clearly.
- Warm Water (and possibly a mild salt rinse): For rinsing your mouth.
- Why you need it: To keep the area clean and help with any mild pain.
- Gloves (optional): To keep things clean and prevent germs.
- Why you need them: Good hygiene is important for mouth work.
- Dental Wax for Loose Crown (if reattachment is not possible): This can cover sharp edges or fill a gap.
- Why you need it: It provides comfort. It protects your tongue and cheek.
| Item Type | Specific Item | Purpose |
|---|---|---|
| Adhesive | Over-the-counter crown glue | To temporarily re-cement the crown |
| Temporary dental cement | (Same as above) | |
| Dental adhesive for crowns | (Same as above) | |
| Cleaning | Toothbrush and toothpaste | To clean the crown and tooth |
| Cotton swabs / balls | To dry the tooth and apply cement | |
| Gauze pads | To keep the area dry | |
| Dental floss | To clean around the tooth | |
| Warm water / salt rinse | To rinse and clean the mouth | |
| Comfort/Protection | Dental wax for loose crown | To cover sharp edges or sensitive spots |
| Tools/Other | Small mirror | To see the tooth clearly |
| Gloves (optional) | For hygiene and grip |
Step-by-Step Guide: Re-cementing Crown at Home
This part will guide you through the process of at-home crown reattachment. Take your time. Do not rush. This will help make sure you do it right. Remember, this is a loose crown emergency fix.
Step 1: Clean the Crown and Tooth
This is a very important first step. The glue will not stick well to dirty surfaces.
- Clean the Crown:
- If your crown has come completely off, pick it up carefully.
- Look inside the crown. You might see old cement. Try to gently scrape out as much old cement as you can. Use a toothpick or a clean small tool. Be gentle. Do not scratch the crown.
- Wash the crown under cool water.
- Brush the crown gently with your toothbrush and toothpaste. Make sure all food bits are gone.
- Rinse the crown well.
- Let the crown dry completely. You can use a clean tissue or let it air dry.
- Clean the Tooth:
- Rinse your mouth with warm water. You can add a pinch of salt to the water for a mild rinse. This helps clean the area.
- Use your toothbrush to gently brush the tooth that lost its crown. Brush all surfaces.
- Use dental floss to clean around the tooth. Make sure no food or plaque is left.
- Rinse your mouth again.
Step 2: Dry the Area
The tooth and crown must be very dry. If they are wet, the temporary dental cement will not stick.
- Take cotton swabs or gauze pads.
- Gently dry the tooth. Dry the inside of the crown too.
- Keep your tongue away from the tooth. You can use another cotton roll or gauze pad to block your tongue.
- Take your time to make sure it is completely dry.
Step 3: Check the Fit of the Crown
Before you use any glue, make sure the crown fits.
- Carefully place the crown onto the tooth.
- It should fit in one main way. It usually has grooves that match your tooth.
- It might feel strange at first. But it should slide on without much force.
- Check your bite. Close your mouth slowly. Does it feel normal? Does the crown feel high? If it feels high, it is probably not on right.
- If it does not fit easily, do not force it. Take it off. Try to clean it again. Look for anything blocking it.
- If you cannot make it fit, do not use the glue. This means your tooth might have changed. Or the crown might be bent. In this case, protect the exposed tooth. See your dentist right away.
Step 4: Apply the Over-the-Counter Crown Glue
Follow the directions on your DIY crown repair kit. Each brand might be slightly different. But here are general steps for applying dental adhesive for crowns.
- Open the tube of temporary dental cement.
- Put a very small amount of cement inside the crown. Put it evenly around the inner edge. Do not use too much. A tiny drop is often enough.
- Why not too much? Too much glue will squeeze out. It can stick to your gums. It makes a mess. It can also make the crown sit too high.
- Avoid putting cement on the biting surface. This will help your bite feel right.
- Some kits come with a small mixing tool. Use it if your kit needs you to mix powders and liquids. Mix just enough for one use.
Step 5: Place the Crown
This is the moment of truth. Be steady.
- Hold the crown firmly.
- Carefully place it onto the tooth.
- Make sure it lines up correctly. Use your mirror.
- Gently push the crown down firmly.
- Bite down softly for a few minutes. This helps to seat the crown. Make sure your bite feels normal. If it feels high or off, remove the crown quickly and try again. Do this before the cement sets.
Step 6: Clean Up the Excess Cement
- While the cement is still soft, remove any extra that squeezes out.
- Use a cotton swab or a clean tissue. Wipe gently around the edges of the crown.
- Do not let the cement harden on your gums. It can irritate them.
- You can gently use dental floss between the crown and the next tooth. This makes sure no glue sticks them together. Be very careful. Do not dislodge the crown.
Step 7: Let the Cement Set
- Do not eat or drink for at least 30 minutes to an hour. Check your specific kit instructions.
- This gives the temporary dental cement time to harden fully.
- Avoid chewing on that side of your mouth for the rest of the day. And until you see your dentist.
- Be careful when brushing your teeth. Brush gently around the newly re-cemented crown.
What If You Can’t Reattach It? Protecting Exposed Tooth
Sometimes, you cannot reattach the crown. Maybe it broke. Or you lost it. Or it just will not fit back on right. In this case, your tooth is exposed. This can be painful. It can also lead to more serious problems. This is where protecting exposed tooth steps in.
- Pain Relief: Your exposed tooth might be very sensitive. It might hurt with cold air or sweets. You can take over-the-counter pain medicine like ibuprofen.
- Dental Wax for Loose Crown: If the crown is gone, your tooth might have sharp edges. Or it might just be very sensitive. You can use dental wax.
- Take a small piece of dental wax.
- Roll it into a ball.
- Gently press it over the exposed tooth.
- This covers the tooth. It protects it from food and temperature changes. It also protects your tongue and cheek from sharp edges.
- You can also buy temporary filling material at a drugstore. These kits often come with a small amount of material you can press into the tooth.
- Keep it Clean: Rinse your mouth gently after eating. Use warm salt water. This helps to keep the area clean. It can also help reduce swelling.
- Avoid Chewing: Do not chew on the side where your crown is missing. Stick to soft foods. Cut your food into small pieces.
- Stay Away from Extremes: Avoid very hot, very cold, or very sweet foods and drinks. These can make your tooth hurt more.
Remember, this is not a fix. It is just a way to make you more comfortable. It protects the tooth until you get to your dentist.
When to See a Dentist: Urgency Matters
An at-home crown reattachment is always a temporary solution. You must see your dentist as soon as possible. Delay can lead to bigger problems.
Call your dentist right away if:
- Your crown comes off. Even if you can reattach it, your dentist needs to check why it came off. They need to put it back on with strong, permanent cement.
- You have pain. If the tooth hurts a lot, or the pain does not go away, see your dentist.
- There is swelling. Swelling in your gums or face around the tooth can mean infection. This needs fast care.
- You have a fever. Fever with tooth pain is a serious sign of infection.
- The crown is broken. If your crown is cracked or in pieces, you will likely need a new one. Your dentist must check the tooth.
- You cannot reattach the crown. If it will not fit, or you lost it, you need your dentist to make a plan. Protecting exposed tooth is important in the meantime.
- Your bite feels off. If the reattached crown feels high or strange when you bite, it needs adjusting. This can hurt your jaw over time.
Think of it as a loose crown emergency fix. It gets you out of immediate trouble. But a professional repair is always needed.
Tips for Success with At-Home Crown Reattachment
For the best chance of success with your DIY crown repair kit, keep these tips in mind:
- Read Instructions First: Always read the full instructions on your temporary dental cement kit. Every brand is a bit different.
- Good Lighting: Make sure you have bright light. A headlamp or a bright desk lamp helps a lot. You need to see clearly.
- Practice Dry Runs: Before putting on the cement, practice placing the crown. Do this a few times. Get a feel for how it fits. This makes it easier when the glue is on.
- Use a Mirror: A small mirror is a must. It helps you see the back teeth.
- Do Not Use Too Much Cement: A little goes a long way. Too much can make a mess. It can also make the crown sit too high.
- Keep it Dry: This cannot be stressed enough. Saliva is the enemy of dental glue. Use cotton rolls or gauze to keep the area dry.
- Be Gentle: Do not force the crown. If it does not fit, stop. Forcing it can break the crown or your tooth.
- Avoid Chewing on the Crown: Once reattached, avoid chewing hard foods on that side. This will help the temporary dental cement last longer.
- Do Not Use Non-Dental Glues: Never use super glue, craft glue, or any glue not made for dental use. These glues are toxic. They can cause serious harm to your mouth. They can also damage your tooth beyond repair. Always use proper dental adhesive for crowns.
- Call Your Dentist: No matter how well you reattach your crown, call your dentist. Make an appointment as soon as you can.
Preventing Future Loose Crowns
While this guide helps with how to fix a loose dental crown at home now, prevention is best. Here are ways to help your crowns last longer:
- Brush and Floss Daily: Good oral hygiene prevents new decay. Decay can loosen your crown. Brush twice a day. Floss once a day. Pay extra attention to the gum line around your crowns.
- Regular Dental Check-ups: See your dentist often. They can spot problems early. They can check your crowns. This helps catch loose crowns before they fall out. They can fix small issues.
- Avoid Hard Foods: Limit foods like hard candies, ice, and nuts. These can crack or loosen crowns.
- Stop Chewing on Non-Food Items: Do not chew on pens, pencils, or your fingernails. These habits can harm your teeth and crowns.
- Wear a Night Guard: If you grind or clench your teeth at night, a night guard can help. It protects your crowns and teeth from extra force. Ask your dentist about this.
- Fix an Uneven Bite: If your bite feels off, tell your dentist. An uneven bite can put too much pressure on one crown. This can make it loose.
Taking good care of your crowns makes them last longer. It means fewer dental emergencies. But if a crown does come loose, you now know the steps for a temporary fix. You know how to do an at-home crown reattachment.
Frequently Asked Questions (FAQ)
Q1: What is the best over-the-counter crown glue to use?
A1: Look for products sold as “temporary dental cement” or “dental repair kits.” Brands like Dentemp, Temparin, or similar products found in drugstores are good choices. Always pick one made for dental use.
Q2: How long will a re-cemented crown last with an at-home fix?
A2: An at-home fix is very temporary. It might last from a few hours to a few days. It gives you time to get to your dentist. It is not meant to last weeks or months.
Q3: Can I eat normally after reattaching my crown at home?
A3: No. You should avoid eating or drinking for at least 30-60 minutes after the fix. Then, avoid chewing on that side of your mouth. Eat soft foods. Be very careful until your dentist sees you.
Q4: What if my crown broke when it came off?
A4: If your crown is broken, you cannot reattach it. It needs professional care. Protect the exposed tooth with dental wax. Then, call your dentist right away. You will likely need a new crown.
Q5: Is it okay to use super glue for a loose crown emergency fix?
A5: No, never use super glue or any non-dental adhesive. Super glue is toxic. It can burn your gums. It can harm your tooth. It is not safe for your mouth. Only use products made for dental use.
Q6: My tooth is sensitive after the crown came off. What can I do?
A6: Rinse your mouth with warm salt water. You can take over-the-counter pain medicine. If you cannot reattach the crown, cover the sensitive tooth with dental wax. Call your dentist quickly.
Q7: Should I save my crown if it falls off?
A7: Yes, always save your crown. Put it in a small, clean container or a plastic bag. Your dentist might be able to re-cement it. Bring it with you to your dental appointment.
Q8: How can I tell if my crown is loose before it falls off?
A8: You might feel a slight movement. Or it might feel “different” when you bite. Food might get stuck around it more often. If you notice any of these signs, call your dentist for a check-up. Early action can prevent it from falling out completely.