
How to delete all the photos in iPhone, open the Photos app and select all items in the “All Photos” album. Then, tap the trash icon and confirm.
Deleting all photos from your iPhone can free up significant storage space and help organize your device. With the increasing quality of smartphone cameras, photos can quickly accumulate and take up valuable space. Regularly managing and clearing out unnecessary photos can enhance your iPhone’s performance.
Knowing how to efficiently delete all photos is crucial for maintaining a streamlined and clutter-free device. The process is simple and only takes a few steps, making it accessible to everyone. Follow these easy steps to quickly erase all photos and keep your iPhone running smoothly.
How to Delete All the Photos in iPhone?
Introduction To Photo Management On Iphone
Managing photos on an iPhone can be challenging. With time, the photo library grows. It can become cluttered and hard to navigate. Keeping your photos organized is essential for a smooth experience.
Knowing how to delete photos quickly can save time. It also helps in freeing up storage space. This guide will help you understand the need for photo management.
The Need For Decluttering Your Photo Library
Decluttering your photo library is crucial. It helps in finding important photos easily. A cluttered gallery makes it hard to locate specific images.
Over time, your iPhone stores thousands of photos. Many of these photos are duplicates or unnecessary. Deleting unwanted photos can speed up your device.
- Improves photo searchability
- Frees up storage space
- Enhances device performance
Benefits Of A Clean Photo Gallery
A clean photo gallery offers many benefits. It makes your iPhone run faster. You can find your favorite photos easily.
A neat gallery also provides a better user experience. It ensures that you have enough space for new photos and apps.
| Benefits | Description |
|---|---|
| Improved Speed | Your iPhone works faster with fewer photos. |
| Better Organization | Finding photos becomes easier and quicker. |
| More Storage | You have more space for new apps and photos. |
Preparing To Delete Photos
Deleting all the photos on your iPhone can be a big decision. Preparing for this process is essential. Make sure your memories are safe and the process is smooth.
Backup Considerations Before Deletion
Before you delete any photos, it’s wise to back them up. Here are some ways to do that:
- iCloud Backup: Use iCloud to save your photos. Go to Settings > Your Name > iCloud > Photos and enable iCloud Photos.
- Google Photos: Google Photos provides free storage. Download the app, sign in, and enable backup.
- External Storage: Use an external drive. Connect it to your iPhone and transfer photos manually.
Sorting Through Your Photos
Sorting your photos can make the deletion process easier. Follow these steps:
- Open the Photos App: Launch the Photos app on your iPhone.
- Review Albums: Go through your albums. Decide which photos to keep.
- Use the Search Feature: Use the search bar to find specific photos.
- Mark Favorites: Mark important photos as favorites. This will help you identify them later.
- Delete Unnecessary Photos: Select photos you want to delete. Tap the trash icon to remove them.
By following these steps, you can ensure a smooth photo deletion process. Your important memories will be safe and easy to find.
Using The Photos App To Remove Pictures
Deleting all photos on your iPhone can free up space. The Photos app makes this task easy and quick. Follow the steps below to remove pictures efficiently.
Selecting Multiple Photos Quickly
Open the Photos app and tap the “Photos” tab. Tap “Select” at the top-right corner.
To select multiple photos quickly, swipe your finger across the images. This will allow you to select many pictures at once. You can also tap on individual photos to select them.
| Action | Description |
|---|---|
| Select | Tap “Select” in the corner |
| Swipe | Swipe your finger over photos to select multiple |
| Tap | Tap individual photos to select them |
Deleting Photos In Moments, Collections, And Years
To delete photos by moments, collections, or years, go to the “Photos” tab. Tap “Select” and then tap a specific moment, collection, or year.
- Moments: Tap the date header above a set of photos to select all photos in that moment.
- Collections: Tap the date header above a collection to select all photos in that collection.
- Years: Tap the year header to select all photos in that year.
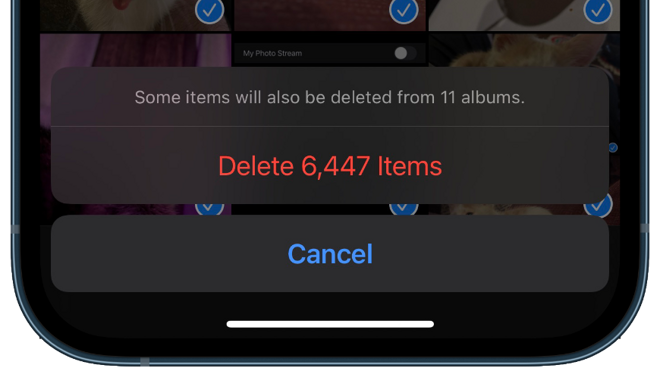
After selecting, tap the trash icon to delete the selected photos. A confirmation message will appear. Confirm to delete the photos.
Leveraging Albums For Bulk Deletion
Deleting multiple photos on an iPhone can be tedious. Leveraging albums for bulk deletion simplifies this process. By organizing photos into temporary albums, you can delete them more efficiently.
Creating Temporary Albums For Organization
Creating temporary albums helps in organizing photos quickly.
- Open the Photos app on your iPhone.
- Tap on the Albums tab at the bottom.
- Tap the + icon to create a new album.
- Give your new album a name, like “To Delete”.
- Select the photos you want to move and tap Done.
Repeat these steps for other groups of photos. This method keeps everything organized for quick deletion.

Deleting An Entire Album
Once you have organized photos into albums, deleting them is easy.
- Navigate to the Albums tab.
- Find the temporary album you created.
- Tap the album to open it.
- Tap the Select button in the top-right corner.
- Tap Select All at the top.
- Tap the Trash icon to delete all selected photos.
- Confirm deletion by tapping Delete.
Deleting an entire album ensures that all photos within it are removed. This method is faster and more efficient.
| Step | Action |
|---|---|
| 1 | Open the Photos app |
| 2 | Create a temporary album |
| 3 | Add photos to the album |
| 4 | Open the album |
| 5 | Select all photos |
| 6 | Delete the photos |
By using these steps, you can efficiently manage and delete multiple photos on your iPhone.
Utilizing Third-party Apps
Sometimes, the built-in tools on the iPhone might not meet your needs. In such cases, utilizing third-party apps can be an excellent solution for managing and deleting all your photos. These apps offer advanced features and user-friendly interfaces.
Popular Photo Management Apps
There are several popular photo management apps available for iPhone:
- Google Photos: Offers unlimited cloud storage and easy photo management.
- Slidebox: Provides simple swipe gestures to delete or organize photos.
- Gemini Photos: Identifies similar and duplicate photos for quick deletion.
- Photo Cleaner: Allows batch deletion and efficient photo management.
Step-by-step Guide For Using Third-party Solutions
Follow these simple steps to delete all photos using a third-party app:
- Download and install the app from the App Store.
- Open the app and grant necessary permissions to access your photos.
- Select all photos you want to delete. Some apps offer a “Select All” option.
- Tap the delete button to remove the selected photos.
- Confirm the deletion when prompted to ensure all photos are removed.
Using third-party apps can save time and offer additional features not available on the iPhone. These apps provide a convenient way to manage your photo library effectively.
Dealing With ‘recently Deleted’ Folder
Deleting photos from an iPhone can be tricky. The ‘Recently Deleted’ folder keeps your photos for 30 days. This is a safety net for accidental deletions. But you might want to delete them permanently. Here’s how to handle the ‘Recently Deleted’ folder.
Understanding The ‘recently Deleted’ Album
The ‘Recently Deleted’ album is a special feature. It holds deleted photos for 30 days. During this period, you can restore or permanently delete them. This album helps you recover any photo deleted by mistake.
To access the ‘Recently Deleted’ album:
- Open the Photos app.
- Scroll down to Albums.
- Find and tap on Recently Deleted.
Permanently Removing Photos From ‘recently Deleted’
Permanently deleting photos is crucial. It ensures your iPhone storage is free. Follow these steps to permanently delete photos:
- Open the Photos app.
- Go to Albums and select Recently Deleted.
- Tap on Select in the top-right corner.
- Choose the photos you want to delete.
- Tap Delete All at the bottom.
- Confirm by tapping Delete Photos.
Using these steps, you can manage your photo storage better. This ensures no unwanted photos take up space. Now you know how to handle the ‘Recently Deleted’ folder.
Erasing Photos From Icloud
Many iPhone users rely on iCloud to store photos. Deleting photos from iCloud can free up space. It can also help organize your photo library.
How Icloud Photo Deletion Affects Your Devices
Deleting photos from iCloud removes them from all your devices. This includes your iPhone, iPad, and Mac. The photos will no longer be accessible from any device linked to your iCloud account. This helps keep your photo library consistent across devices.
Steps To Delete Photos From Icloud
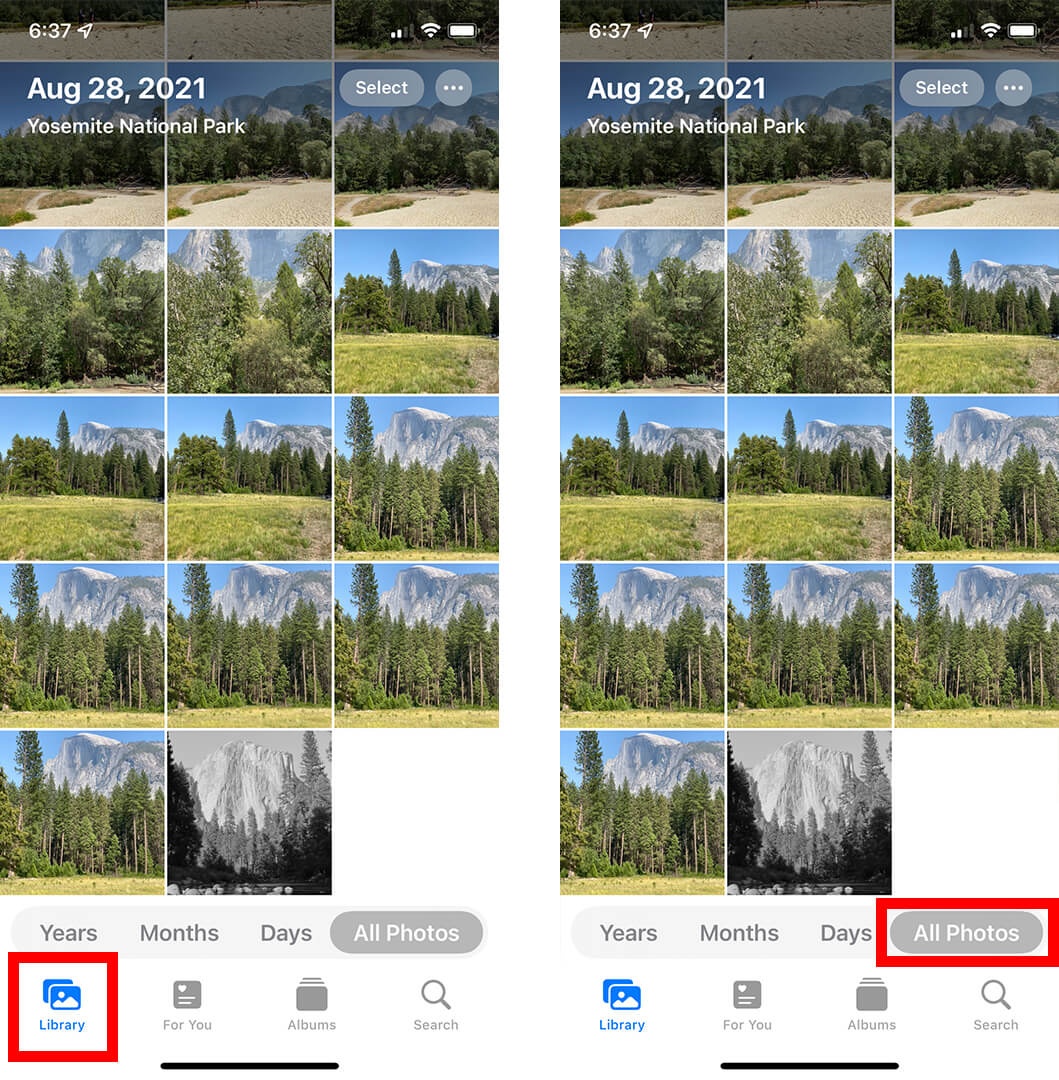
- Open the Photos app on your iPhone.
- Tap on the Albums tab at the bottom.
- Select the All Photos album.
- Tap Select in the top-right corner.
- Select the photos you want to delete.
- Tap the trash can icon at the bottom-right.
- Confirm by tapping Delete Photos.
This process deletes the photos from your iCloud account. They will be removed from all devices connected to that account. Make sure to check your Recently Deleted album. This ensures that the photos are permanently removed.
| Step | Action |
|---|---|
| 1 | Open Photos app |
| 2 | Tap Albums |
| 3 | Select All Photos |
| 4 | Tap Select |
| 5 | Select photos to delete |
| 6 | Tap trash can icon |
| 7 | Confirm deletion |
Factory Reset: A Last Resort
Deleting all photos on your iPhone can sometimes be a hassle. If you need a quick and comprehensive solution, a factory reset is your last resort. This method erases everything on your device, ensuring all photos are deleted. But, it’s essential to understand when and how to use this option.
When To Consider A Factory Reset
Consider a factory reset if:
- Your iPhone is running out of storage space.
- You plan to sell or give away your iPhone.
- You face persistent software issues.
- You want to start fresh with a clean device.
Consequences And Steps To Perform A Factory Reset
Before performing a factory reset, know its consequences:
- All data, including photos, will be erased.
- Settings will return to factory defaults.
- Apps and personal data will be removed.
Steps to perform a factory reset:
- Back up your important data.
- Open the Settings app.
- Go to General and tap Reset.
- Select Erase All Content and Settings.
- Enter your passcode if prompted.
- Confirm your decision to reset your iPhone.
Remember, a factory reset should be your last option. Use it only if necessary.
Troubleshooting Common Issues
Deleting all photos on an iPhone can sometimes be tricky. You might face issues that stop photos from deleting properly or worry about recovering mistakenly deleted photos. This section will help you solve these common problems.
Photos Not Deleting Properly
If your photos are not deleting properly, follow these steps:
- Check if your iPhone has enough storage space.
- Ensure you have a stable internet connection.
- Restart your iPhone to clear any temporary glitches.
- Make sure your iPhone is updated to the latest iOS version.
If these steps don’t work, try these advanced solutions:
- Disable iCloud Photo Library:
- Go to Settings > Photos.
- Turn off iCloud Photos.
- Use a third-party app to delete photos:
- Download a photo management app from the App Store.
- Follow the app instructions to delete photos.
Recovering Mistakenly Deleted Photos
Accidentally deleted photos can be recovered easily:
- Open the Photos app.
- Go to the Albums tab.
- Scroll down to Recently Deleted.
- Select the photos you want to recover.
- Tap Recover to restore them.
Note: Photos in the Recently Deleted album stay for 30 days. After that, they are permanently deleted.
If you can’t find your photos in the Recently Deleted album, try these tips:
- Check if you have an iCloud backup:
- Go to Settings > Your Name > iCloud.
- Check if iCloud Backup is turned on.
- Use a third-party recovery tool:
- Download a reliable recovery tool from the App Store.
- Follow the tool’s instructions to recover photos.
By following these steps, you can troubleshoot common issues and ensure your photos are managed effectively on your iPhone.
Maintaining A Clutter-free Photo Library
Keeping your iPhone’s photo library organized can save time and stress. A clutter-free photo library ensures you can easily find and enjoy your favorite memories. Let’s explore some effective strategies to keep your photos in order and avoid future clutter.
Regularly Organizing Your Photos
Regular organization of your photos is key. Follow these steps:
- Delete Duplicates: Use apps to find and delete duplicate photos.
- Sort by Date: Create albums based on dates for easier access.
- Tag People: Use the “People” feature to organize photos by individuals.
- Use Folders: Group similar albums into folders for better structure.

Credit: www.hellotech.com
Tips For Avoiding Photo Clutter In The Future
Preventing future clutter is just as important. Here are some tips:
- Set Regular Reminders: Schedule time to organize photos weekly or monthly.
- Use Cloud Storage: Store photos in the cloud to save device space.
- Limit Screenshots: Be selective with screenshots to avoid unnecessary clutter.
- Delete Unwanted Photos Immediately: Remove blurred or unwanted photos right away.
- Use Photo Management Apps: Utilize apps designed to help manage and organize photos.
By following these tips, your iPhone photo library will stay neat and organized. Enjoy the ease of finding your cherished moments without the hassle of clutter.
Conclusion
Deleting all photos on your iPhone is simple with our step-by-step guide. Follow the instructions for a clutter-free device. Remember to back up important photos before deleting. Enjoy more storage and a better-organized photo library. Stay tuned for more tech tips to enhance your digital life.
