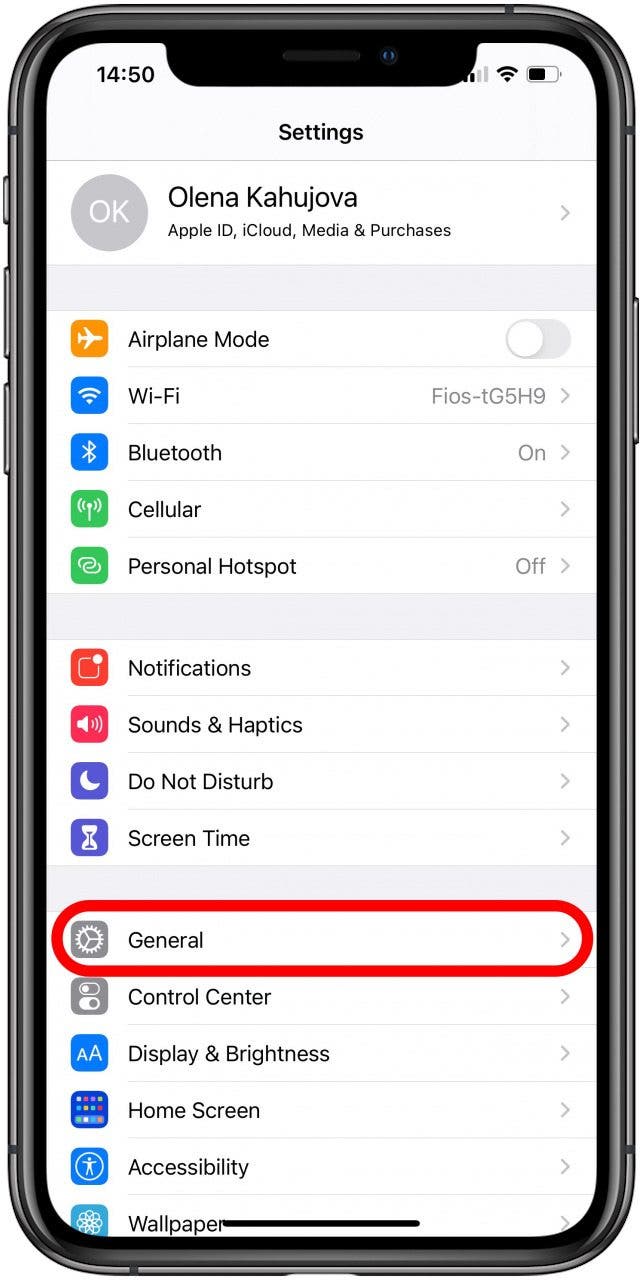
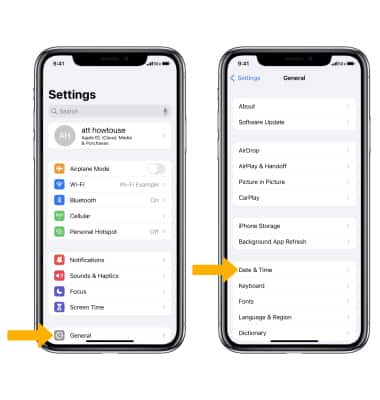
How to change the time on the iPhone, go to Settings, then tap General, and select Date & Time. Toggle off Set Automatically and manually set the time.
Changing the time on your iPhone is a straightforward process that ensures your device operates accurately. Accurate time settings are crucial for various functions, including alarms, calendar events, and reminders. Adjusting the time manually can be necessary when traveling across time zones or if the automatic settings do not reflect your current location accurately.
This guide will walk you through the steps to manually change the time on your iPhone, making sure your device remains in sync with your schedule and activities. Follow these simple steps to keep your iPhone’s time settings up to date.
How to Change the Time on the iPhone?

Preparation
Before changing the time on your iPhone, it’s crucial to prepare. Ensuring everything is set correctly will save you from issues later. Follow these steps for smooth preparation.
Check Software Version
Make sure your iPhone is running the latest iOS version. Updating your software can fix bugs and improve performance.
To check your software version, follow these steps:
- Open the Settings app on your iPhone.
- Scroll down and tap General.
- Tap Software Update.
- If an update is available, tap Download and Install.
Backup Important Data
Backing up your data ensures you won’t lose important information. Use iCloud or your computer for backups.
To back up using iCloud, follow these steps:
- Open the Settings app.
- Tap your Apple ID at the top.
- Tap iCloud.
- Scroll down and tap iCloud Backup.
- Tap Back Up Now.
To back up using your computer:
- Connect your iPhone to your computer.
- Open iTunes (or Finder on macOS Catalina and later).
- Select your device.
- Click Back Up Now.
With your software updated and data backed up, you’re ready to change your iPhone’s time.

Accessing Settings
Accessing Settings on your iPhone is the first step to changing the time. This process is simple and quick. Follow these steps to get started.
Open The Settings App
First, locate the Settings app on your iPhone. The icon looks like a gray gear. Tap on it to open the app. This app contains all the settings for your iPhone.
Navigate To General
After opening the Settings app, scroll down the list. Look for the option labeled General. It has another gray gear icon next to it. Tap on General to enter the next menu.
In the General menu, you will find various settings. These include software updates, About, and more. This is where you will find the option to change the time.
Setting The Time
Setting the time on your iPhone is easy. Follow these simple steps. You can manually adjust the time on your device. This ensures you always have the correct time displayed.
Select Date & Time
First, open the Settings app on your iPhone. Scroll down and tap on General. Next, find and tap on Date & Time.
You will see the current date and time. You can change these settings manually. This step is important if you travel often or need specific time settings.
Toggle Off Set Automatically
To manually set the time, you must toggle off the Set Automatically option. You will see a switch next to this option. Tap the switch to turn it off.
Now, you can set the time manually. You will see options to change the date and time. Use these options to set the correct time.
Here’s a quick recap:
- Open Settings.
- Tap on General.
- Select Date & Time.
- Toggle off Set Automatically.
- Manually set the date and time.
Manual Time Adjustment
Sometimes, you may need to adjust your iPhone’s time manually. This could be due to travel, issues with automatic settings, or personal preference. Follow these steps to change the time manually on your iPhone.
Select Time Zone
First, you need to ensure your time zone is correct.
- Open the Settings app on your iPhone.
- Scroll down and tap on General.
- Tap on Date & Time.
- Toggle off Set Automatically if it’s enabled.
- Tap on Time Zone.
- Type your city or region in the search bar.
- Select the correct time zone from the list.
Manually Enter Date And Time
Once you have set your time zone, you can manually enter the date and time.
- Ensure the Set Automatically toggle is off.
- Tap on the Date & Time field.
- Use the scroll wheels to set the correct date.
- Adjust the time using the hour and minute scroll wheels.
- Confirm the changes by tapping Back.
Your iPhone’s time is now manually set.
Automatic Time Setting
Setting the time on your iPhone can be effortless. The Automatic Time Setting feature allows your iPhone to adjust the time automatically. This ensures you always have the correct time without manual adjustments.
Enable Set Automatically
To enable the Set Automatically feature, follow these steps:
- Open the Settings app on your iPhone.
- Scroll down and tap on General.
- Tap on Date & Time.
- Toggle the switch next to Set Automatically to the On position.
Once enabled, your iPhone will use your location to set the correct time.
Verify Time Accuracy
To verify the accuracy of your time settings:
- Ensure your iPhone is connected to a Wi-Fi network or cellular data.
- Check if the Time Zone is correctly displayed under Date & Time.
- Restart your iPhone if the time is still incorrect.
If the issue persists, consider checking your location settings:
- Go to Settings and select Privacy.
- Tap on Location Services.
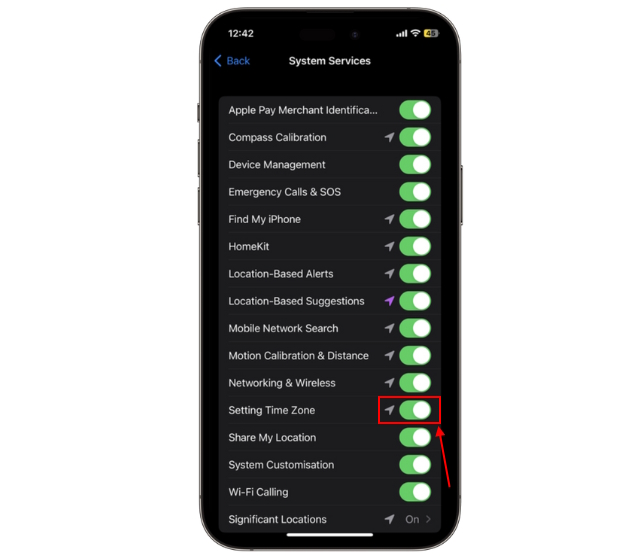
- Ensure Location Services is turned on.
These steps will help maintain the accuracy of your iPhone’s time settings.

Troubleshooting
Changing the time on your iPhone is usually straightforward. Sometimes, you might face issues while doing so. This troubleshooting guide will help you solve common problems. Let’s explore how to address these issues.
Common Issues
Some users encounter problems when changing the time on their iPhones. Here are the most common issues:
- Automatic Time Zone: The iPhone may not detect your location correctly.
- Software Glitches: Minor bugs can prevent time changes.
- Network Issues: Poor network can affect time updates.
- Settings Restrictions: Parental controls may block time changes.
Resetting Network Settings
Sometimes, resetting network settings can fix time-related issues. Follow these steps to reset your network settings:
- Open the Settings app on your iPhone.
- Scroll down and tap General.
- Scroll to the bottom and select Reset.
- Tap Reset Network Settings.
- Enter your passcode if prompted.
- Confirm by tapping Reset Network Settings again.
This will reset your Wi-Fi networks, passwords, and cellular settings. It will not delete your data.
Conclusion
Changing the time on your iPhone is simple and quick. Follow the steps outlined above for success. Now, you can easily keep your device’s clock accurate. Stay on time and enjoy a seamless experience with your iPhone. Don’t forget to regularly check and update your settings.


