Image Source: i.ytimg.com
Guide: How To Calibrate A Healthometer Scale Precisely
Can you calibrate a Healthometer scale? Yes, you can. Calibrating your Healthometer scale makes sure it gives you correct weight readings. This guide will show you how to do this. We will cover both digital and mechanical models. A well-calibrated scale helps you track your health goals better. It also makes sure your health data is right.
The Value of Scale Accuracy
Why is a precise scale so important? An accurate scale helps you know your true weight. This is key for health tracking. If your scale is off, your health data will be wrong. This can make it hard to reach your fitness goals. Correct weight readings help you see real progress. This boosts your spirits and keeps you on track. It prevents confusion about your body’s changes.
A proper working scale builds trust. You need to trust the numbers you see. Without trust, checking your weight can feel useless. So, getting your scale right is a big deal. It gives you the power to make good health choices. This is why learning how to zero a Healthometer scale and perform a Healthometer scale adjustment is so important. It ensures your bathroom scale accuracy fix is complete.
Distinguishing Healthometer Scale Types
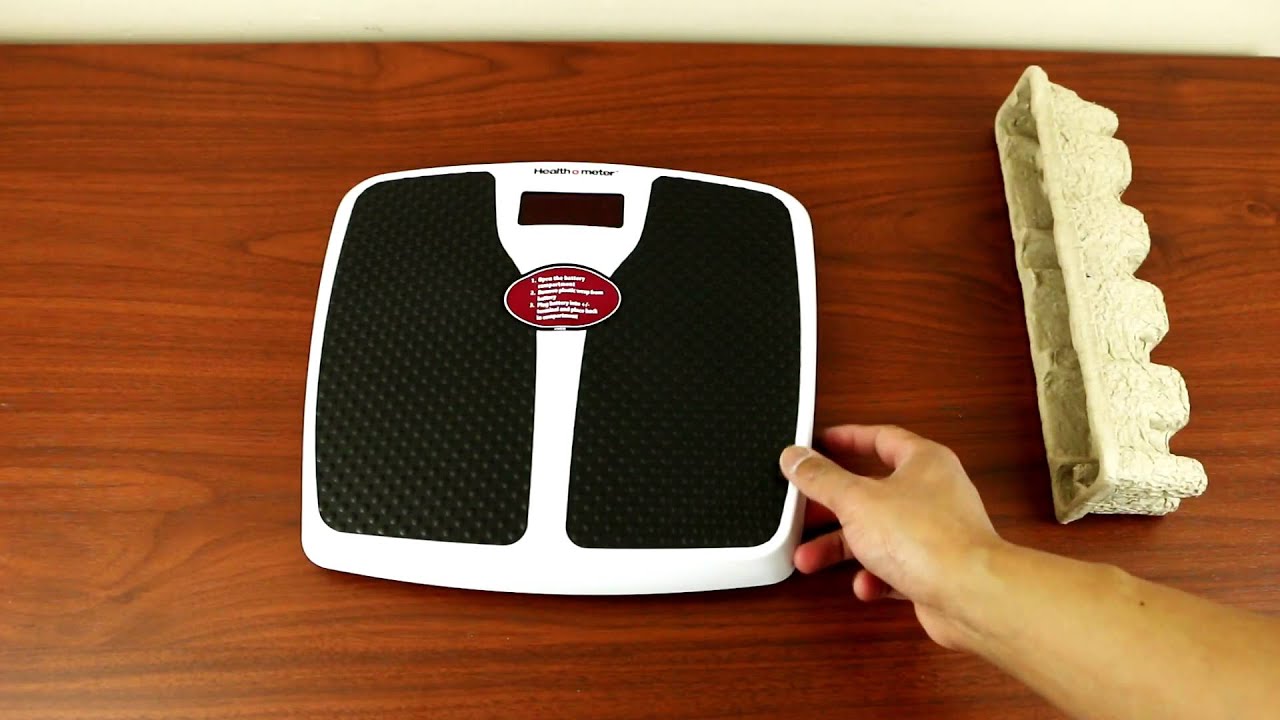
Healthometer makes different kinds of scales. Knowing your scale type is the first step. There are two main types: digital and mechanical. Each type has its own way to be set right.
Electronic Healthometer Scales
Digital scales are common today. They show your weight on a screen. Many use batteries. Some have fancy features. These include body fat or muscle mass readings. Resetting Healthometer digital scale models often involves buttons or specific steps. They are usually easy to use. But they can also lose accuracy over time.
Mechanical Healthometer Scales
Mechanical scales are older models. They have a dial with a needle. You stand on them, and the needle points to your weight. They do not use batteries. They work with springs and levers. Mechanical Healthometer calibration often means turning a small wheel or screw. They are tough and last long. Yet, their needles can drift off zero.
Preparing for Calibration
Before you start, you need a few things. Having them ready makes the job easier. It also helps you do it right the first time.
Essential Items for Calibration
- Known Weights: You need items with a sure weight. These can be hand weights. Bags of flour or sugar work too. A gallon of water weighs about 8.3 pounds. Use at least two different weights. One light, one heavier. This helps check the scale’s full range.
- A Flat, Hard Surface: Scales need a firm base. Do not put them on carpet. Carpet can make readings wrong. A tile or wood floor is best.
- Small Screwdriver Set (for some mechanical scales): Some mechanical models might need a small tool. This helps turn the adjustment screw.
- New Batteries (for digital scales): Old batteries can make digital scales act weird. Always put in fresh ones before you calibrate.
Ideal Spot for Your Scale
The place where your scale sits matters a lot. Always put your scale on a hard, even floor. Tiles, wood, or concrete work well. Do not put it on carpet, rugs, or uneven surfaces. These can cause Healthometer weight discrepancies. Placing it against a wall is also good. This keeps it stable. Once you find the right spot, try to keep the scale there. Moving it around can affect its readings. This is part of troubleshooting Healthometer readings.
Calibrating Your Digital Healthometer Scale
Digital scales are popular. They are easy to use. But they need care to stay accurate. Here are the Healthometer calibration instructions for digital models.
First Steps for Digital Scales
- Place the Scale: Put your digital scale on a very flat, hard surface. This is important for correct readings. Avoid rugs or soft floors.
- Check Batteries: Make sure your scale has fresh batteries. Low batteries can cause wrong numbers. Replace them if needed. This is key for resetting Healthometer digital scale models.
- Power Cycle: Take out the batteries. Wait about 10-15 seconds. Then put them back in. This often clears any bad data. It’s a quick fix for many digital scale issues.
The Zeroing Process for Digital Scales
Zeroing your digital scale is vital. It tells the scale what “nothing” weighs.
- Tap to Turn On: Gently tap your foot on the scale. Do not step on it yet. Wait for the display to show “0.0” or “0.00”.
- Step Off: Once it shows zero, step off the scale. Let it turn off completely.
- Repeat: Do this “tap-off” process a few times. This helps the scale find its true zero point. This is how to zero a Healthometer scale digitally.
Using Known Weights for Digital Accuracy
Now you will use your known weights. This helps check and fix the scale.
- First Weight Test: Place your first known weight on the scale. Make sure it is centered. Let the reading settle. Write down the number.
- Example: If you use a 10-pound weight, the scale should read 10.0.
- Remove Weight: Take the weight off. Wait for the scale to turn off or show zero again.
- Second Weight Test: Place your second known weight on the scale. Again, center it. Write down the reading.
- Example: If you use a 25-pound weight, the scale should read 25.0.
- Check for Errors: Compare the scale readings to the true weights.
- If the numbers match, your scale is good!
- If they are off, you need to adjust it. This is where you work on correcting Healthometer scale errors.
Digital Scale Adjustment: When Readings Are Off
Most digital Healthometer scales do not have a manual “adjustment” button. They self-calibrate. If your readings are consistently off, try these steps again:
- Move the Scale: Try placing the scale in a different spot. Make sure the floor is truly flat.
- Firm Tap & Zero: Sometimes a very firm tap (not stomping) before stepping on it helps. Let it zero out.
- Multiple Readings: Take 3-5 readings in a row. Are they all off by the same amount? This suggests a consistent error.
- Manual Calibration (Rare): Some professional-grade digital Healthometer scales might have a menu or button sequence for manual calibration. Check your scale’s user manual for “Healthometer scale adjustment” or “recalibrating Healthometer” steps. This is uncommon for home bathroom scales. If your manual shows this, follow it closely.
Table 1: Digital Healthometer Calibration Checklist
| Step | Action | Notes |
|---|---|---|
| 1. Placement | Hard, flat surface. | Crucial for accurate readings. |
| 2. Batteries | Fresh batteries inserted. | Prevents erratic readings. |
| 3. Power Cycle | Remove, wait 10-15s, reinsert batteries. | Resets internal circuits. |
| 4. Zeroing | Tap scale, wait for “0.0”, step off. Repeat 2-3 times. | Establishes baseline. |
| 5. Known Weight Test (1) | Place first known weight (e.g., 10 lbs). Note reading. | Checks accuracy at a lower range. |
| 6. Known Weight Test (2) | Place second known weight (e.g., 25 lbs). Note reading. | Checks accuracy at a higher range. |
| 7. Compare Readings | Check if scale reading matches known weight. | If off, try steps 1-4 again. Consult manual if persistent. |
Calibrating Your Mechanical Healthometer Scale
Mechanical scales work differently. They often have a simple adjustment. This helps with mechanical Healthometer calibration.
Initial Steps for Mechanical Scales
- Place the Scale: Just like digital scales, place your mechanical Healthometer on a hard, flat floor.
- Check the Needle: Look at the scale’s dial. Does the needle point exactly to zero? If not, it needs adjustment. This is part of how to zero a Healthometer scale.
Zeroing the Mechanical Scale
This is the main step for mechanical Healthometer calibration.
- Find the Adjustment Wheel/Screw: Most mechanical Healthometer scales have a small wheel or knob. It is usually found near the bottom of the dial. Or it might be on the side. This is for Healthometer scale adjustment.
- Turn the Wheel: Gently turn this wheel. Watch the needle as you turn. Your goal is to make the needle point exactly to “0”.
- Turn one way if the needle is below zero.
- Turn the other way if it’s above zero.
- Be gentle. Small turns make big changes.
- Confirm Zero: Once the needle is at zero, lightly tap the scale a few times. Does the needle stay at zero? If it moves, adjust it again.
Testing with Known Weights for Mechanical Accuracy
After zeroing, check with weights.
- First Weight Test: Place your first known weight on the scale. Center it. Read the number the needle points to. Write it down.
- Remove Weight: Take the weight off. The needle should return to zero. If it does not, adjust the zero point again.
- Second Weight Test: Put your second known weight on the scale. Center it. Note the reading.
- Evaluate Accuracy: Compare the scale readings to the actual weights.
- If they match, your mechanical scale is set!
- If they are off, repeat the zeroing step. Then retest. If the error remains, the internal springs might be old. This is a common bathroom scale accuracy fix for mechanical scales.
Table 2: Mechanical Healthometer Calibration Checklist
| Step | Action | Notes |
|---|---|---|
| 1. Placement | Hard, flat surface. | Essential for stable readings. |
| 2. Initial Needle Check | Observe if the needle is at “0”. | If not, proceed to adjustment. |
| 3. Locate Adjustment Wheel | Find the small wheel/knob near the dial or on the side. | This is your mechanical Healthometer calibration point. |
| 4. Adjust to Zero | Gently turn the wheel until the needle points exactly to “0”. | Small turns are best. |
| 5. Confirm Zero | Lightly tap the scale; needle should stay at “0”. Adjust if needed. | Ensures stability of the zero point. |
| 6. Known Weight Test (1) | Place first known weight. Note reading. | Checks accuracy at a lower range. |
| 7. Known Weight Test (2) | Place second known weight. Note reading. | Checks accuracy at a higher range. |
| 8. Compare Readings | Check if scale reading matches known weight. | If off, repeat steps 4-7. Persistent errors may need repair. |
Tackling Healthometer Weight Discrepancies and Troubleshooting
Even with calibration, scales can give odd readings. Here’s how to fix common problems. This is about troubleshooting Healthometer readings. It helps with correcting Healthometer scale errors.
Common Causes of Bad Readings
- Uneven Surface: This is the top reason for wrong weights. Make sure your scale is on a flat, hard floor. Even a tiny tilt can cause a big error.
- Old Batteries (Digital): As noted, weak batteries can make digital scales behave strangely. Numbers might jump or be way off. Always use fresh ones.
- Moving the Scale: If you move your scale often, it can lose its calibration. Try to keep it in one spot.
- Stepping On Too Fast: For digital scales, wait until “0.0” shows. Stepping on before it’s ready can give a false reading.
- Sensor Problems (Digital): If your digital scale consistently gives very high or very low numbers, its internal sensors might be bad. This often means the scale needs replacing.
- Spring Issues (Mechanical): Over time, the springs in mechanical scales can wear out. This makes them less accurate. If repeated calibration doesn’t help, this might be the reason.
- Temperature Changes: Big changes in room temperature can affect both digital and mechanical scales. Try to keep your scale in a stable environment.
Fixing Inaccurate Readings
If your scale gives strange numbers, try these Healthometer calibration instructions again:
- Check Placement: Is it truly flat? Try another spot in the same room.
- Re-zero: For digital, do the tap-off until zero shows. For mechanical, use the adjustment wheel. This is the first bathroom scale accuracy fix.
- Use Known Weights: Always test with known weights after zeroing. This confirms if your recalibrating Healthometer efforts worked.
- Clean the Scale: Dust or dirt under the scale can affect sensors. Keep it clean, especially the feet.
- Remove Objects: Make sure nothing is touching the scale. This includes walls, cabinets, or even a stray towel.
Table 3: Common Troubleshooting Steps
| Problem | Possible Cause | Action |
|---|---|---|
| Inconsistent Readings | Uneven surface, frequent movement | Move scale to flat, stable spot; keep it there. |
| Digital Scale Not Turning On/Off | Dead batteries, internal fault | Replace batteries; if problem persists, unit may be faulty. |
| Mechanical Needle Not at Zero | Scale moved, adjustment knob shifted | Re-adjust the zero knob. |
| Readings Always High/Low (Consistent) | Sensor issue (digital), worn springs (mechanical) | Re-calibrate carefully. If problem remains, consider replacing scale. |
| Readings Jump Around (Digital) | Low batteries, dirty sensors | Replace batteries; clean scale surface and feet. |
| No Reading / Error Message (Digital) | Overload, internal error | Remove weight; refer to manual for error codes. Sometimes a power cycle helps. |
Keeping Your Scale Accurate Long-Term
Calibration is not a one-time thing. Your scale needs ongoing care. This helps avoid future Healthometer weight discrepancies.
Best Practices for Scale Longevity
- Stable Location: Keep your scale in one spot. Move it as little as possible. Pick a place that is flat and firm.
- Regular Cleaning: Wipe down your scale often. Use a soft, damp cloth. Avoid harsh cleaners. Keep the bottom and feet clean.
- Battery Care: For digital scales, change batteries every 6-12 months. Do this even if they seem fine. Low batteries often cause subtle errors before they die.
- Avoid Overload: Do not put too much weight on your scale. Every scale has a weight limit. Check your manual. Overloading can damage the sensors or springs.
- Temperature Stability: Keep your scale out of extreme heat or cold. A stable room temperature is best.
- Calibrate Often: Try to recalibrate your Healthometer every few months. Or do it if you move it. This ensures ongoing bathroom scale accuracy fix. It’s a simple part of your health routine.
When to Recalibrate
- After Moving: If you move your scale, recalibrate it.
- After Battery Change: Always calibrate after putting in new batteries.
- If Readings Seem Off: If your weight seems suddenly high or low, check your scale. Use known weights to test it.
- Every Few Months: A general rule is to calibrate every 3-6 months. This keeps it accurate over time.
When to Seek Help or Replace Your Scale
Sometimes, your scale might be beyond a simple fix. Troubleshooting Healthometer readings has its limits.
Signs Your Scale Needs More Help
- Persistent Errors: You have followed all Healthometer calibration instructions. Yet, the readings are still wrong. This is a sign of a deeper problem.
- Inconsistent Readings: The scale gives different weights within minutes. You test with a known weight. It shows different numbers each time.
- Error Messages (Digital): Your digital scale shows constant error codes. And they do not clear after power cycles or battery changes.
- Physical Damage: The scale looks bent or cracked. This can mess up its inner workings.
Deciding on Replacement
It might be time for a new scale if:
- It’s Very Old: Especially mechanical scales. Their springs can weaken with age.
- It’s Been Dropped: A hard fall can ruin a scale, even if it looks okay.
- Cost vs. Repair: For many home scales, buying a new one is cheaper than trying to repair it. Most are not designed to be fixed.
- Your Needs Change: Maybe you want a smart scale now. One that tracks more than just weight.
Investing in a good, accurate scale is part of taking charge of your health. Regular Healthometer scale adjustment and care make sure you always have reliable data.
Frequently Asked Questions (FAQ)
How often should I calibrate my Healthometer scale?
It is a good idea to recalibrate Healthometer scales every 3 to 6 months. Also, recalibrate if you move the scale or change its batteries. This ensures the best bathroom scale accuracy fix.
Why does my digital Healthometer scale give different readings each time I step on it?
Many factors can cause this. The most common are:
* Uneven floor: Make sure your scale is on a flat, hard surface.
* Low batteries: Replace them with fresh ones.
* Not waiting for “0.0”: Step on the scale only after it shows zero.
* Moving the scale: Try to keep it in one spot.
These are common Healthometer weight discrepancies to check.
Can I use household items to calibrate my Healthometer scale?
Yes, you can. Use items with a known weight. For example, a new bag of sugar or flour often weighs exactly 5 pounds. A gallon of water is about 8.3 pounds. Use these to check your scale’s accuracy.
My mechanical Healthometer scale’s needle won’t stay at zero. What should I do?
First, find the small adjustment wheel or knob. It is usually near the dial. Gently turn it until the needle points right at zero. Then, lightly tap the scale. If the needle moves off zero, adjust it again. If it keeps moving off zero, the springs inside might be old. This means the mechanical Healthometer calibration is getting harder to hold.
Is there a “reset” button on Healthometer digital scales?
Most common home Healthometer digital scales do not have a direct “reset” button. To reset them, you usually remove the batteries for 10-15 seconds. Then, put them back in. Some models may have a specific tap sequence to reset. Check your scale’s manual for “resetting Healthometer digital scale” instructions.
How do I know if my Healthometer scale is broken and not just needs calibration?
If you have followed all Healthometer calibration instructions and troubleshooting steps, and your scale still gives wildly inaccurate or inconsistent readings, it might be broken. If a digital scale shows constant error messages or a mechanical scale’s needle never settles, it might be time for a new scale. This covers correcting Healthometer scale errors that are more severe.