
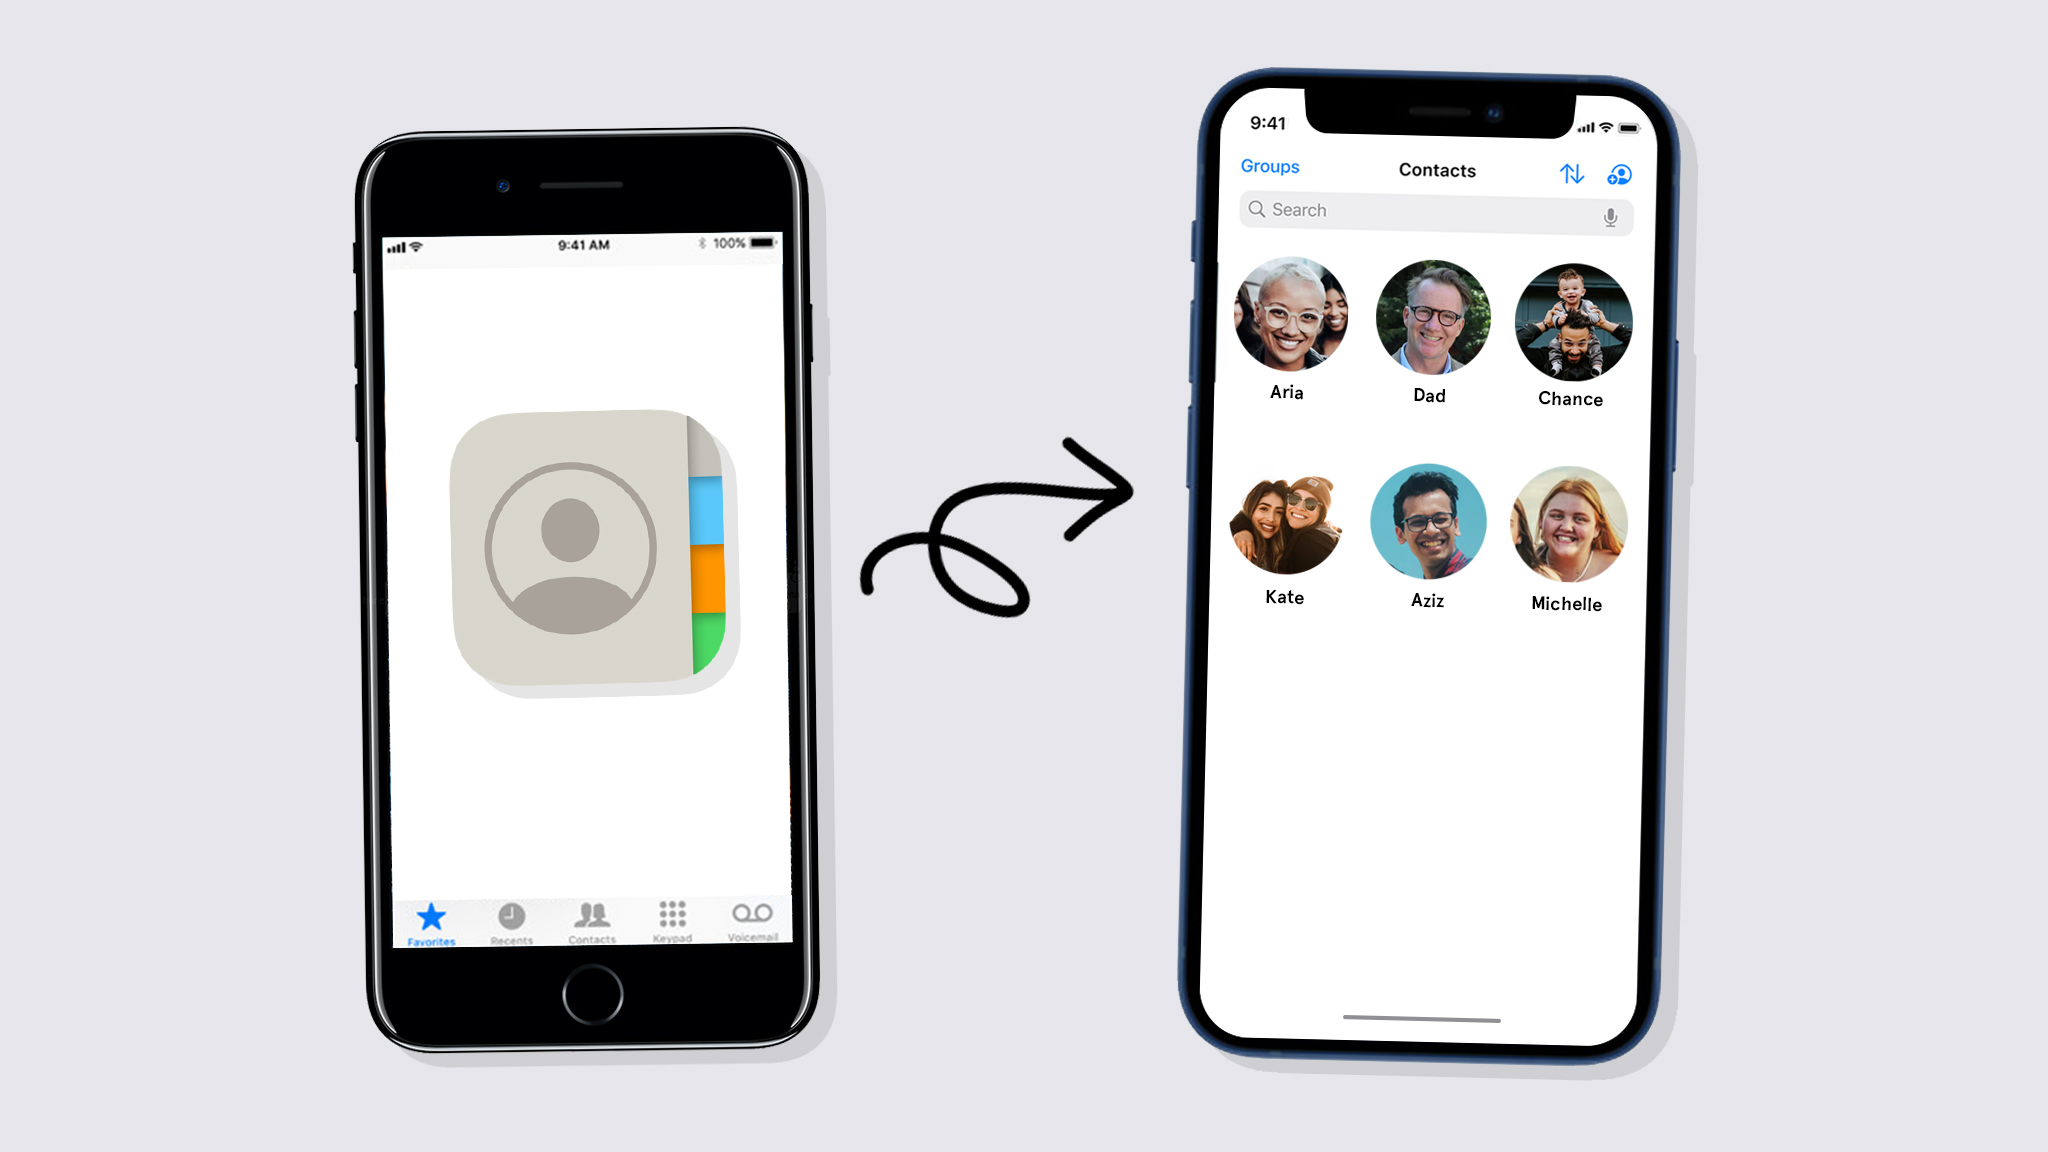
How Do You Import Contacts from iPhone to iPhone, use iCloud to sync your contacts. Ensure both devices are signed into the same Apple ID.
Transferring contacts between iPhones is a straightforward process with the help of iCloud. This method ensures that all your contacts are seamlessly transferred, keeping your data intact and up-to-date. First, make sure both iPhones are connected to Wi-Fi and signed into the same Apple ID.
Navigate to the Settings app on your old iPhone, tap on your Apple ID, then iCloud, and toggle on the Contacts option. Wait for the contacts to sync, then repeat the same steps on your new iPhone. Your contacts will automatically appear on the new device, making the transition smooth and hassle-free.
How Do You Import Contacts from iPhone to iPhone?
Setting Up Your New Iphone
Getting a new iPhone is exciting. The first step is to set it up. This process ensures your device is ready for use. Follow these steps to make your new iPhone feel like home.
Initial Setup
Turn on your new iPhone by pressing the power button. You will see the Apple logo. Follow the on-screen instructions. Choose your language and region. This helps your iPhone provide the correct settings.
Next, you will see the Quick Start screen. If you have another device, bring it close. This helps in setting up faster. If not, select Set Up Manually.
Connecting To Wi-fi
Connecting to Wi-Fi is crucial. It enables faster data transfer. Choose your Wi-Fi network from the list. Enter the password if needed. Wait for the connection to establish. A stable Wi-Fi connection ensures a smooth setup.
Once connected, your iPhone will activate. This may take a few minutes. Ensure your Wi-Fi signal is strong. Weak signals might delay the process.
After activation, you can proceed with restoring your data. Ensure your old iPhone is nearby. This will help in transferring contacts easily.
| Step | Action |
|---|---|
| 1 | Turn on the iPhone |
| 2 | Select language and region |
| 3 | Connect to Wi-Fi |
| 4 | Follow on-screen instructions |
These steps ensure your iPhone is set up correctly. You are now ready to import contacts.
Using Icloud To Transfer Contacts
Transferring contacts between iPhones can be a breeze using iCloud. This method ensures your contacts remain safe and accessible. Below, we’ll guide you through the steps.
Enabling Icloud On Old Iphone
First, you need to enable iCloud on your old iPhone. Follow these steps:
- Open Settings on your old iPhone.
- Tap on your Apple ID at the top.
- Select iCloud from the list.
- Toggle on the Contacts option to enable it.
Ensure your old iPhone is connected to Wi-Fi. This will help in syncing your contacts faster.
Syncing Contacts
After enabling iCloud, your contacts will start syncing. To ensure they are synced, follow these steps:
- Go to Settings again.
- Tap on your Apple ID.
- Select iCloud.
- Check if the Contacts toggle is on.
Now, pick up your new iPhone. Follow these steps to transfer the contacts:
- Turn on your new iPhone.
- During setup, sign in with the same Apple ID.
- Ensure iCloud is enabled.
- Toggle on the Contacts option.
Your contacts should now appear on your new iPhone.
If they don’t appear, make sure both devices are connected to Wi-Fi. This will help complete the sync process.
Transferring Contacts Via Itunes
Transferring contacts from one iPhone to another can be simple. Using iTunes is one effective method. It ensures your contacts move accurately and securely. Follow these steps to transfer your contacts via iTunes.
Connecting To Itunes
First, connect your old iPhone to your computer. Use a USB cable for this connection. Open iTunes on your computer. Make sure you have the latest version of iTunes.
Once connected, your iPhone should appear in iTunes. Select your device icon. Go to the “Info” tab. Here, you can choose to sync contacts. Check the box next to “Sync Contacts.”
Click “Apply” to start the syncing process. Wait for iTunes to finish syncing. This may take a few minutes.
Syncing Contacts With New Iphone
Now, disconnect your old iPhone. Connect your new iPhone to the computer. Again, use a USB cable for this. Open iTunes and select your new iPhone.
Go to the “Info” tab again. Check the box next to “Sync Contacts.” Make sure you select “All Contacts.” Click “Apply” to start the sync.
Wait for iTunes to transfer the contacts to your new iPhone. Once done, check your new iPhone. Your contacts should now be available on your new device.
This method ensures a smooth and secure transfer of contacts. iTunes makes the process easy and reliable.
Using Airdrop For Contact Transfer
Transferring contacts from one iPhone to another can be simple. One of the easiest methods is using AirDrop. This feature allows you to share contacts wirelessly. Here, we explain how to do it step-by-step.
Enabling Airdrop
First, make sure AirDrop is enabled on both iPhones. Follow these steps:
- Open the Control Center on both iPhones.
- Press and hold the network settings card (the box that includes Airplane Mode, Wi-Fi, and Bluetooth).
- Tap on AirDrop.
- Select Everyone to make your iPhone discoverable.
Now, both iPhones can detect each other for AirDrop.
Sending Contacts
Once AirDrop is enabled, you can start sending contacts:
- Open the Contacts app on the source iPhone.
- Select the contact you want to share.
- Tap on Share Contact.
- Select AirDrop as the sharing method.
- Choose the target iPhone from the list of available devices.
- The target iPhone will receive a notification to accept the contact.
- Tap Accept to complete the transfer.
By following these simple steps, you can easily transfer contacts using AirDrop. This method is quick and does not require any cables or additional apps.
Transferring Contacts With Third-party Apps
Transferring contacts between iPhones can be easy with third-party apps. These apps provide a smooth, user-friendly experience. They help you move your contacts quickly. Let’s explore how you can do this effortlessly.
Choosing An App
Various apps can help you transfer contacts. Some popular ones include:
- My Contacts Backup
- Copy My Data
- Contact Transfer
Choose an app that suits your needs. Look for good reviews and ratings. Ensure the app is compatible with both iPhones.
Step-by-step Guide
Follow these steps to transfer contacts:
- Download the chosen app on both iPhones.
- Open the app on the old iPhone.
- Grant necessary permissions to access contacts.
- Follow the app’s instructions to export contacts.
- Open the app on the new iPhone.
- Import the contacts as guided by the app.
Your contacts should now be on your new iPhone. It’s a quick and simple process. Using third-party apps can save you time and effort.
Troubleshooting Common Issues
Importing contacts from iPhone to iPhone can sometimes encounter issues. Here, we address common problems and provide solutions.
Syncing Problems
Syncing issues can prevent contacts from transferring. Follow these steps to resolve syncing problems:
- Ensure both iPhones have the latest iOS version.
- Verify both devices are connected to Wi-Fi.
- Go to Settings > [your name] > iCloud and ensure Contacts is toggled on.
- Restart both iPhones and try syncing again.
If the issue persists, check iCloud storage. Full storage can block syncing:
- Open Settings > [your name] > iCloud > Manage Storage.
- Free up space if necessary.
Missing Contacts
Sometimes, contacts don’t appear after transfer. Try these steps to recover missing contacts:
First, ensure contacts are set to display:
- Go to Contacts app.
- Tap Groups in the top-left corner.
- Select All iCloud to view all contacts.
Check if contacts are stored locally or in another account:
- Open Settings > Contacts > Accounts.
- Ensure all accounts are toggled on.
For contacts stored in email accounts:
| Step | Action |
|---|---|
| 1 | Open Settings > Contacts > Accounts. |
| 2 | Select the email account. |
| 3 | Ensure Contacts is toggled on. |
These solutions should help you resolve common issues when importing contacts from iPhone to iPhone.
Restoring Contacts From Backup
Restoring contacts from a backup is an effective way to transfer contacts between iPhones. This method ensures that no important contact information is lost. Here are two primary methods to restore contacts from a backup: iCloud Backup and iTunes Backup.
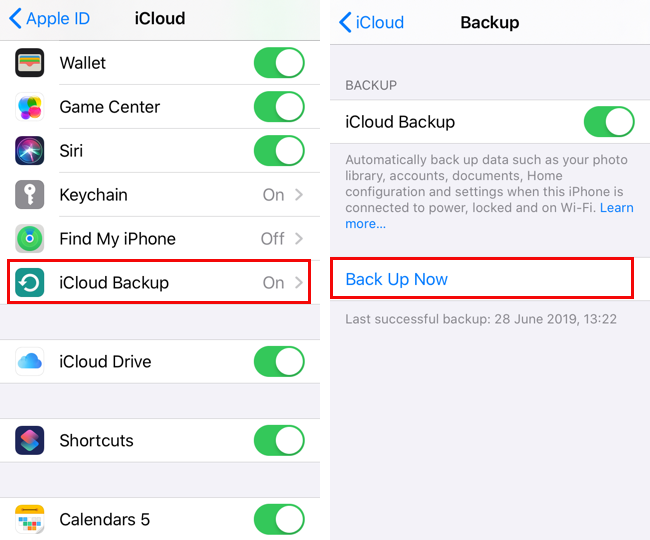
Icloud Backup
Using iCloud to restore contacts is simple and convenient. Ensure both iPhones are connected to Wi-Fi.
- On the new iPhone, go to Settings.
- Tap Apple ID and sign in with your Apple ID.
- Open iCloud and toggle on Contacts.
- Navigate to Settings > General > Reset.
- Select Erase All Content and Settings.
- Choose Restore from iCloud Backup.
- Select the desired backup from the list.
This process will restore all contacts from your iCloud backup.
Itunes Backup
Restoring contacts from an iTunes backup requires a computer with iTunes installed. Ensure you have the latest version of iTunes.
- Connect your new iPhone to the computer using a USB cable.
- Open iTunes and select your device.
- Click Restore Backup.
- Choose the most recent backup containing your contacts.
- Click Restore and wait for the process to complete.
After the restoration, your contacts will appear on the new iPhone.
Final Steps After Transfer
After transferring your contacts from one iPhone to another, some final steps ensure everything is in place. Verifying your contact list and organizing it helps maintain order and accessibility. Let’s explore these essential steps to ensure a seamless transition.
Verifying Contacts
First, open the Contacts app on your new iPhone. Browse through the list to check if all your contacts are visible. Make sure no contact is missing.
Next, check for duplicates. Sometimes, the transfer process creates duplicate contacts. You can use the built-in merge feature to combine them.
Follow these steps to merge duplicates:
- Open the Contacts app.
- Tap on the contact with duplicates.
- Tap “Edit” at the top-right corner.
- Scroll down and tap “Link Contacts.”
- Select the duplicate contact and tap “Link.”
Repeat these steps for all duplicate entries.
Organizing Contact List
Now, it’s time to organize your contact list. Grouping contacts into categories makes them easy to find.
You can create groups for family, friends, or work contacts. Unfortunately, the iPhone doesn’t support group creation directly. You need to use iCloud for this.
Here’s how you can create groups using iCloud:
- Go to iCloud.com and log in with your Apple ID.
- Click on “Contacts.”
- In the sidebar, click the “+” button and select “New Group.”
- Name the group appropriately.
- Drag and drop contacts into the new group.
These groups will sync to your iPhone automatically.
Another way to organize is by editing contact details. Add photos, email addresses, or notes to each contact. This makes it easier to recognize and remember them.
Updating contact information ensures all details are current. Regularly review and update your contacts. This helps maintain an accurate and useful contact list.

Conclusion
Transferring contacts from iPhone to iPhone is a simple process. Use iCloud, iTunes, or third-party apps. Ensure your contacts are safe and accessible. Follow these steps for a seamless experience. Enjoy your new iPhone without any hassle. Remember to back up regularly to avoid data loss.