
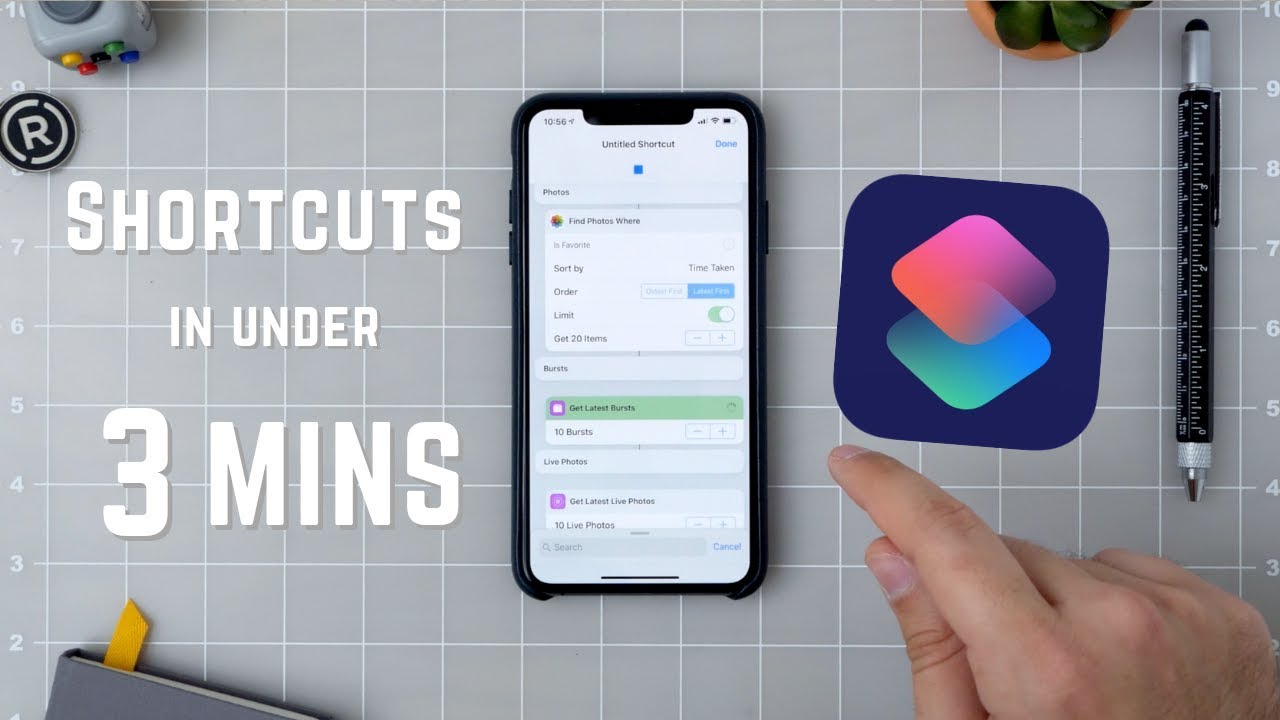
How to make a GIF with an iPhone, use the Live Photos feature and convert it in the Photos app. Open Photos, select a Live Photo, swipe up, and choose “Loop.”
Creating GIFs on your iPhone is simple and enjoyable. GIFs are perfect for sharing short, animated moments with friends and family. The iPhone’s built-in features make it easy to capture and convert Live Photos into GIFs. This process doesn’t require additional apps, saving you time and storage space.
By following a few straightforward steps, you can transform your Live Photos into looping animations. This guide will walk you through the process, ensuring you can create and share your own GIFs with ease. Start turning your favorite moments into fun, shareable animations today.
How to Make a GIF with an iPhone?

Introduction To Gifs On Iphone
GIFs are short, looping videos. They are popular in digital communication. Making GIFs on an iPhone is simple. You can create GIFs using your photos and videos. This guide will show you how.
Popularity Of Gifs In Digital Communication
GIFs have become a key part of online chats. They make messages fun and engaging. People use GIFs to express emotions and reactions. Social media platforms support GIFs. Sharing GIFs can make your messages stand out.
Advantages Of Creating Gifs On Your Iphone
iPhones come with powerful cameras. This makes capturing high-quality videos easy. You can turn these videos into GIFs. iPhones also have various apps for editing GIFs. These apps offer tools for adding text and effects.
| Advantage | Description |
|---|---|
| High-Quality Camera | iPhones capture clear and vibrant videos. |
| Easy Editing | Apps make adding text and effects simple. |
| Convenience | You can create GIFs anytime, anywhere. |
To create a GIF, you need an iPhone and an app. Follow these steps:
- Open the Camera app and record a video.
- Download a GIF-making app from the App Store.
- Open the app and select your video.
- Edit the video to your liking.
- Save and share your GIF!
Making GIFs on an iPhone is fun and easy. You can share your creations with friends. Enjoy the world of GIFs!
Prerequisites For Making Gifs
Creating GIFs on your iPhone is simple. You’ll need the right tools and apps. Also, ensure your device meets the software requirements. Here are the essentials:
Essential Apps And Tools
Before you start, download these apps from the App Store:
- GIPHY: This app lets you create and share GIFs easily.
- ImgPlay: Convert videos or photos into GIFs with this tool.
- GIF Maker: A simple app for quick GIF creation.
These apps are free and easy to use. They offer various features to enhance your GIFs.
Iphone Models And Software Requirements
Ensure your iPhone is compatible. Here’s a quick table of models and iOS versions:
| iPhone Model | Minimum iOS Version |
|---|---|
| iPhone SE (1st Gen) | iOS 13 |
| iPhone 7/7 Plus | iOS 13 |
| iPhone 8/8 Plus | iOS 14 |
| iPhone X and later | iOS 14 |
Make sure your iPhone runs on the required iOS version. Update your software if needed.
Once you have the apps and meet the requirements, you’re ready to create GIFs on your iPhone!
Capturing The Perfect Moment
Creating a GIF on your iPhone can be a fun way to share moments. Capturing the perfect moment is key to making an engaging GIF. Below are some tips to help you record and select the best segments.
Tips For Recording Video
- Hold Your iPhone Steady: Use both hands to keep the phone stable.
- Check Your Lighting: Good lighting makes videos clearer and more vibrant.
- Frame Your Shot: Make sure the main subject is in the center.
- Keep It Short: Record short clips, around 5 to 10 seconds.
Selecting The Best Segments For Gifs
Choosing the right part of your video is crucial. Follow these steps:
- Watch the Entire Video: Identify the most interesting parts.
- Pick the Highlight: Look for clear actions or expressions.
- Trim the Clip: Use editing tools to cut out unnecessary parts.
Following these tips ensures your GIFs are engaging and fun to share.
Using Live Photos To Create Gifs
Live Photos on an iPhone capture moments in a unique way. They record 1.5 seconds before and after you click the shutter button. This makes them perfect for creating GIFs. Follow these simple steps to transform your Live Photos into engaging GIFs.
How To Take A Live Photo
First, ensure your iPhone supports Live Photos. iPhone 6s and later models support this feature.
- Open the Camera app on your iPhone.
- At the top of the screen, you’ll see several icons. Look for the Live Photo icon. It looks like a set of concentric circles.
- Tap the Live Photo icon to enable it. It should turn yellow when active.
- Frame your shot and press the shutter button.
You’ve now captured a Live Photo! Next, learn how to convert it into a GIF.
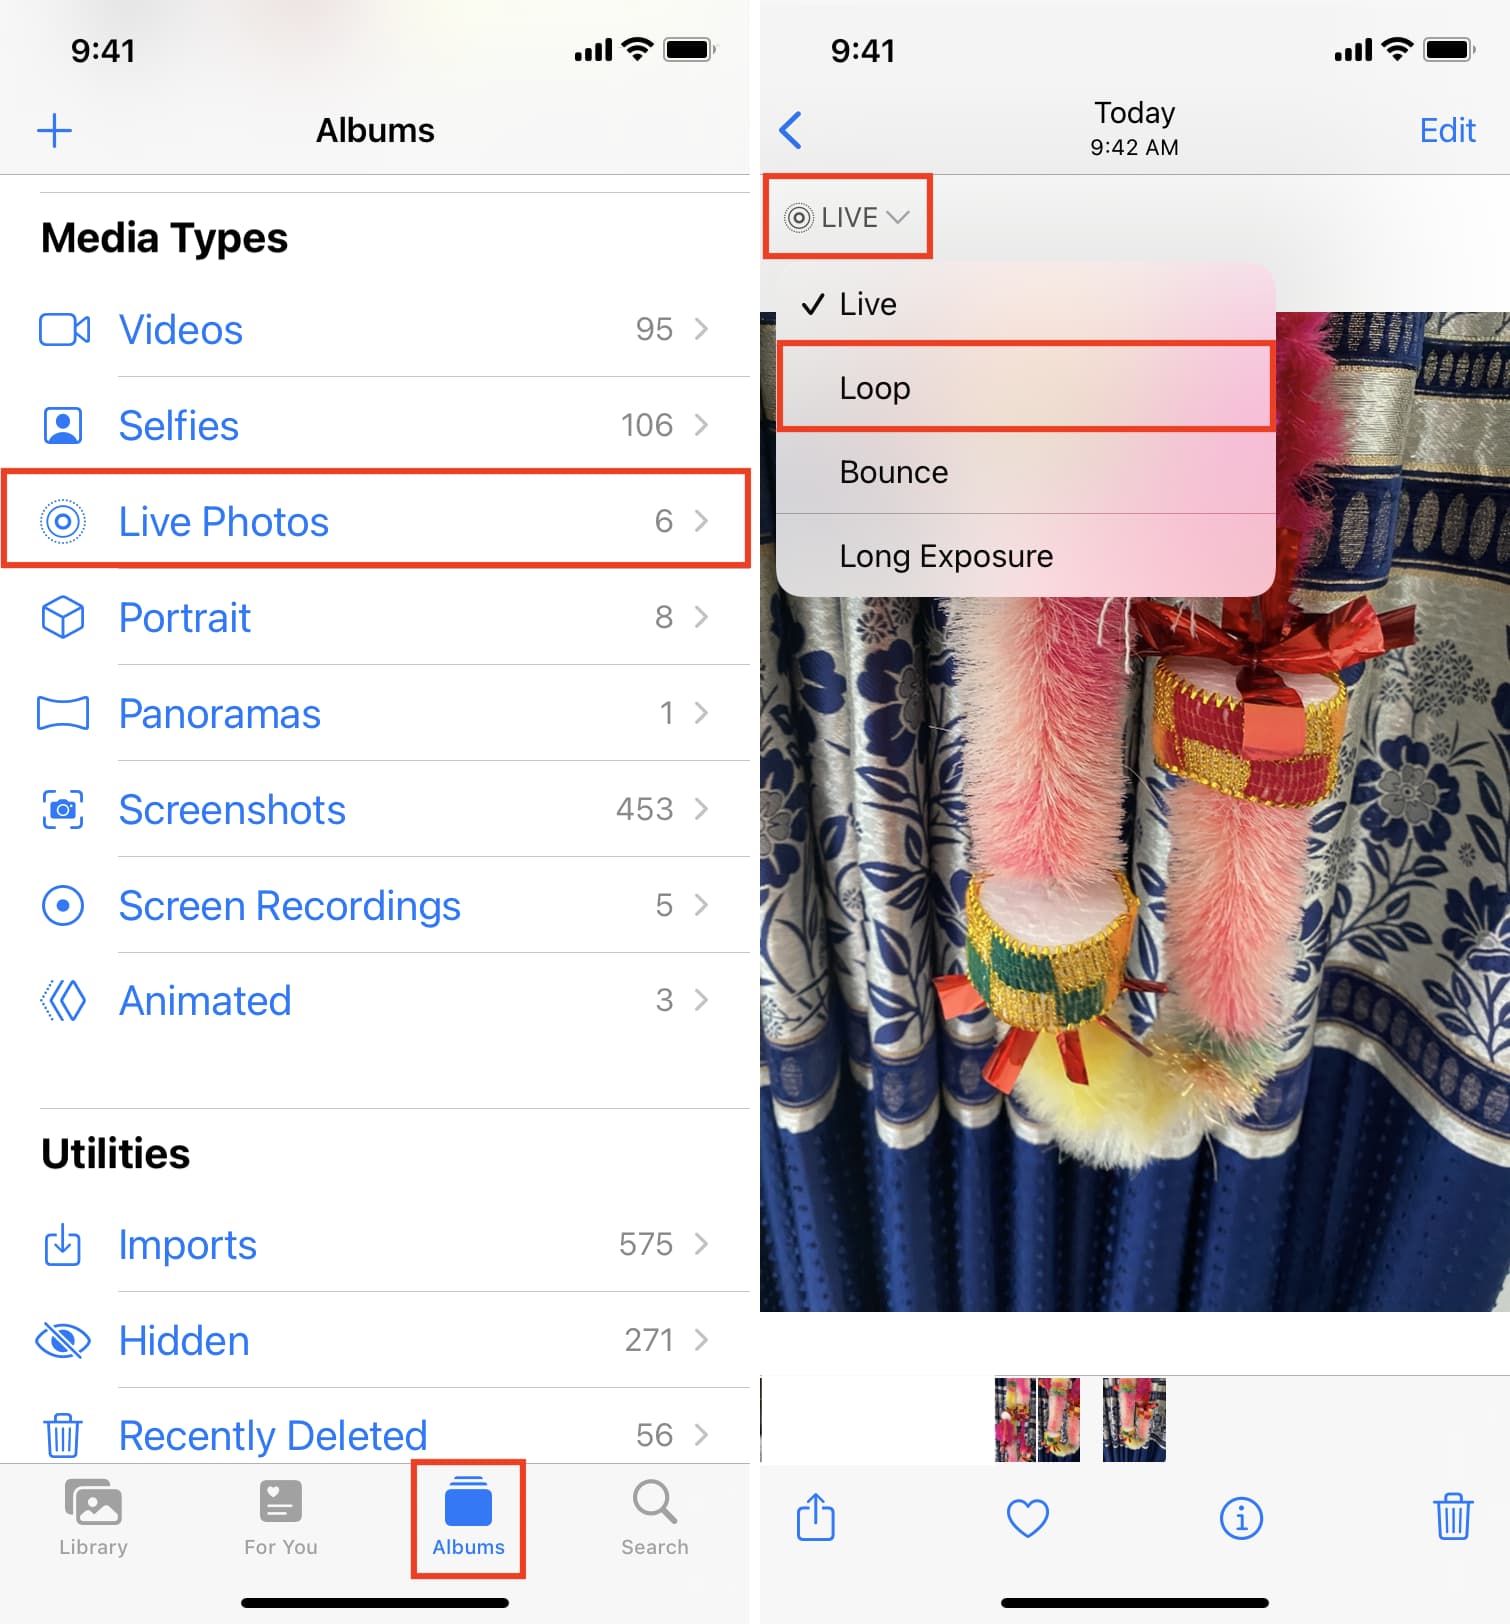
Converting Live Photos To Gifs
Your Live Photo is ready. Convert it into a GIF using the Photos app.
- Open the Photos app and navigate to your Live Photo.
- Swipe up on the photo to reveal Effects.
- You will see four options: Live, Loop, Bounce, Long Exposure.
- Select either Loop or Bounce. These options will turn your Live Photo into a GIF-like animation.
Your Live Photo is now a GIF! Share it with friends or post it on social media.
Third-party Apps For Gif Creation
Creating GIFs on an iPhone is easy with third-party apps. These apps offer advanced features and user-friendly interfaces. Below, you’ll find the top-rated GIF maker apps and a step-by-step guide to using them.
Top-rated Gif Maker Apps
| App Name | Features | Cost |
|---|---|---|
| GIPHY | Large library, easy-to-use editor | Free |
| ImgPlay | Multiple formats, customizable options | Free with in-app purchases |
| GIF Maker | High-quality GIFs, various effects | Free |
Step-by-step Guide To Using Third-party Apps
Follow these steps to create a GIF using third-party apps:
- Download and install your chosen GIF maker app from the App Store.
- Open the app and grant necessary permissions like camera and photos access.
- Choose your media: photos, videos, or live photos.
- Edit your media by trimming, adding text, or applying filters.
- Tap the create button to generate your GIF.
- Save the GIF to your camera roll or share it directly on social media.
Using third-party apps makes GIF creation fun and versatile. These apps provide many options to customize your GIFs. Try different apps to find the best one for you.
Editing And Customizing Your Gif
Creating a GIF on your iPhone is just the beginning. To make it more engaging, you can edit and customize it. Adding text, filters, and adjusting frame rates can bring your GIF to life. Here’s how you can do it:
Adding Text And Filters
To add text, open your GIF in the editing app. Look for the text option, usually represented by a “T” icon. Tap it and type your desired text. You can change the font, size, and color. This makes your GIF more expressive.
Filters can add a unique touch to your GIF. Tap on the filter icon to explore various options. Choose one that enhances your GIF. Filters can change the mood and make your GIF stand out.
Trimming And Adjusting Frame Rates
Trimming your GIF is essential for removing unwanted parts. Open the trimming tool in the editing app. Drag the sliders to select the portion you want to keep. This makes your GIF more concise.
Adjusting the frame rate can make your GIF smoother. Look for the frame rate adjustment option. Increasing the frame rate makes the GIF faster, while decreasing it slows it down. Find the perfect balance for your GIF.
| Editing Feature | Description |
|---|---|
| Adding Text | Insert text, choose font, size, and color |
| Filters | Apply different filters to change mood |
| Trimming | Remove unwanted parts of the GIF |
| Frame Rate | Adjust speed for smoothness |
- Text: Enhances expression
- Filters: Unique touch
- Trimming: Concise GIF
- Frame Rate: Smoothness
Saving And Sharing Your Gif
Creating a GIF on your iPhone is fun and easy. The next step is to save and share your creation. Let’s dive into the simple steps for exporting and sharing your GIFs.
Exporting Gifs To Your Photo Library
After creating your GIF, you will want to save it. Follow these steps:
- Open the GIF in your editing app.
- Tap the export icon, usually a box with an arrow.
- Select Save to Photos.
- Your GIF is now in your Photo Library.
Saving your GIF in the Photo Library makes it easy to find later. You can access it anytime you want.
Sharing Gifs On Social Media And Messaging Apps
Sharing your GIF is just as simple. Here’s how you can share it:
- Open your Photo Library and find your GIF.
- Tap the share icon, a box with an arrow.
- Choose the app you want to share it on.
Below is a quick guide on sharing through popular platforms:
| Platform | Steps to Share |
|---|---|
| Tap Facebook icon, add a caption, then post. | |
| Tap Instagram icon, choose Story or Feed, then share. | |
| Tap Twitter icon, add a tweet, then post. | |
| iMessage | Tap Message icon, select contact, then send. |
| Tap WhatsApp icon, select contact, then send. |
Sharing your GIFs can make your conversations more fun. It’s easy to add a personal touch to your messages.
Advanced Tips And Tricks
Creating GIFs on your iPhone can be a lot of fun. But do you want to take your GIF-making skills to the next level? This section covers some advanced tips and tricks to help you create amazing GIFs that stand out. Let’s dive into the details.
Looping And Reversing Frames
Looping and reversing frames can add a unique touch to your GIFs. Here’s how you can do it:
- Open your GIF in the Photos app.
- Tap on Edit and then select Loop or Bounce.
- To reverse frames, use apps like GIF Maker or GifX.
Looping makes your GIF play endlessly. Reversing creates a boomerang effect. Experiment with both to see what works best for your GIF.
Combining Multiple Gifs
Combining multiple GIFs can make your content more dynamic. Follow these steps:
- Use the GIPHY app to import multiple GIFs.
- Select the Combine option.
- Arrange your GIFs in the desired order.
- Save the combined GIF to your camera roll.
Combining GIFs allows you to create a story or sequence. It adds depth to your content.
Try these advanced tips and tricks to make your GIFs more engaging. With practice, you’ll be a GIF-making pro in no time.
Troubleshooting Common Issues
Creating GIFs on an iPhone can be fun. Sometimes, you might face issues. Here, we will troubleshoot common GIF problems.
Resolving Quality And Size Problems
Is your GIF blurry or too large? These steps can help:
- Check the resolution: High resolution can make GIFs large. Lower the resolution.
- Adjust the frame rate: Too many frames can increase size. Reduce the frame rate.
- Use GIF compression tools: Tools like EZGIF can compress your GIFs without losing quality.
Here’s a comparison of different resolutions and sizes:
| Resolution | Size | Quality |
|---|---|---|
| 1080p | Large | High |
| 720p | Medium | Good |
| 480p | Small | Fair |
Fixing Gif Playback Errors
If your GIF won’t play, try these fixes:
- Check the format: Ensure the file is a GIF. Other formats won’t work.
- Restart your iPhone: A simple restart can fix many issues.
- Update your apps: An outdated app might not support GIFs. Update it.
- Clear the cache: Old data can cause problems. Clear the app’s cache.
If problems persist, consider reinstalling the app. This often resolves deeper issues.
Conclusion
Creating a GIF with an iPhone is simple and fun. Follow the steps outlined in this guide. You can easily transform your photos and videos into engaging GIFs. Share your creations on social media to impress your friends. Start experimenting today and unleash your creativity with GIFs!
